
The Plan
I knew I wanted to build a dedicated grill pad for my Blackstone Original 28-inch, 2-Burner Propane Griddle with Hood. The griddle measured approximately 53 inches wide by 26 inches deep, so I knew the pad needed to be at least that large.
But I didn’t want the grill sitting right against the house or squeezed into a tight space. The hood opened toward the back, so I wanted to keep it far enough away from the house to avoid creating a potential fire hazard. I also wanted to give it some breathing room, leave enough space next to the back steps, and still have room on the side for my smoker.
After taking all of that into consideration, I came up with a rough target area of about 3 feet by 6 feet.
The Project Area
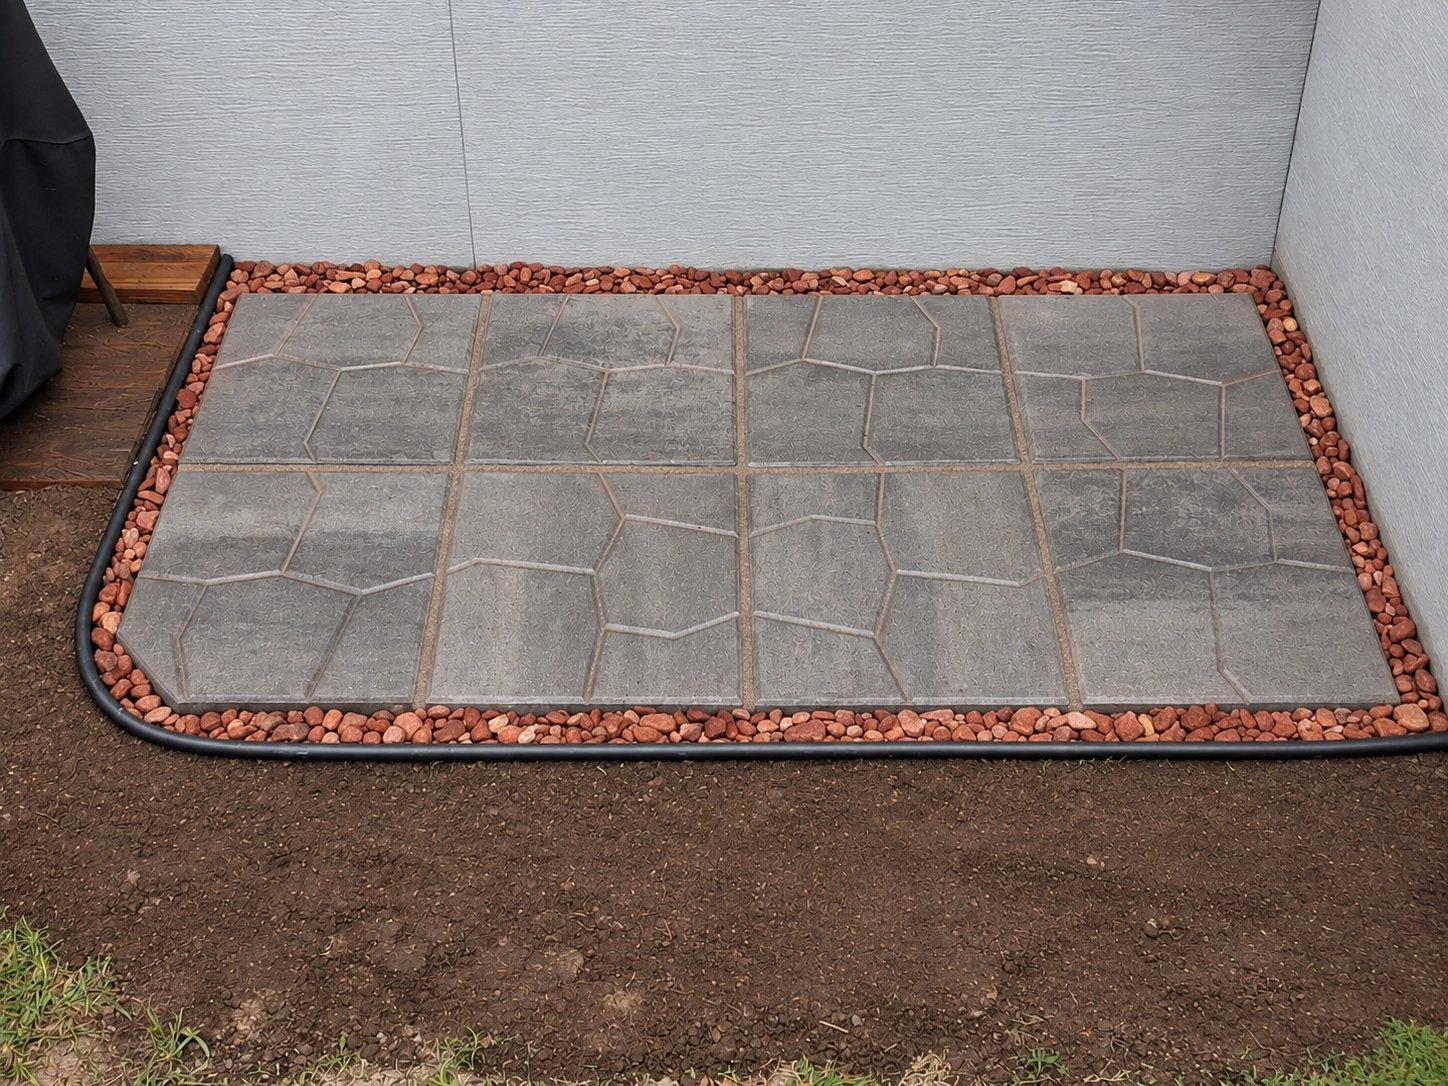
Unfortunately, I didn’t take a before picture, but the area originally consisted of nothing more than grass and dirt. The goal was to turn that unused space into a dedicated area for the Blackstone.
The finished project turned out pretty well. I added landscape edging around the perimeter to define the pad and keep the surrounding decorative rock in place. The combination of the pavers, black edging, and reddish stone gave the area a nice finished look while keeping it separate from the surrounding yard.
Choosing the Pavers and Preparing the Base
The first thing I did was purchase the 16″ x 16″ Quarry Gray Lakestone Patio Blocks from Menards. They were 2 inches thick, and I wanted the finished pavers to sit pretty much flush with the decorative rock and landscape edging that would surround the pad.
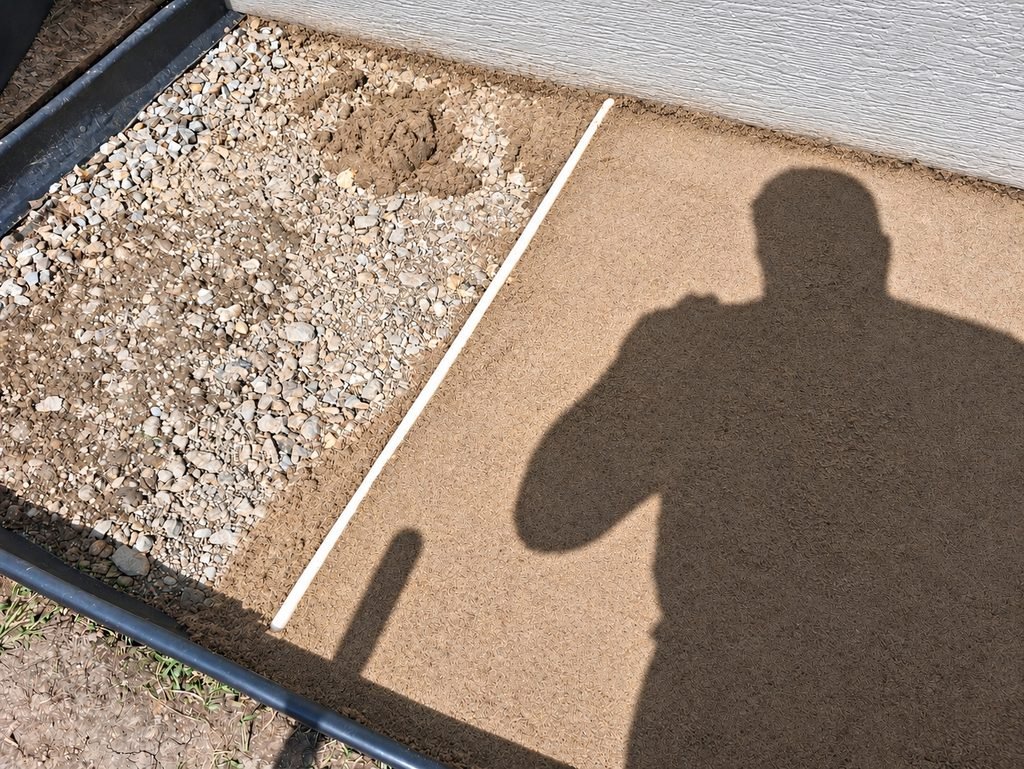
To accomplish that, I needed to account for three layers:
- Pavers: 2 inches
- Paver base stone: 2 inches to provide a stable foundation
- Paver sand: 1 inch for leveling and setting the pavers
That meant I needed to excavate approximately 5 inches of soil to accommodate everything. For this particular project, that depth was sufficient since the pad would primarily support the weight of the griddle and wouldn’t see much foot traffic.
Once I had the area dug out, I started preparing the base. In the picture, you can see a 1-inch pipe that I used as a guide to get the paver sand level. By using the pipe as a screed guide, I could pull the sand across the surface and create a consistent layer for the pavers to sit on. While keeping the surface straight across, I also incorporated a slight slope from the back to the front to ensure any water that collected on the pad would run away from the house. Even though the majority of the pad was protected by an overhang, I still wanted to make sure water could drain properly.
Laying Out the Pavers
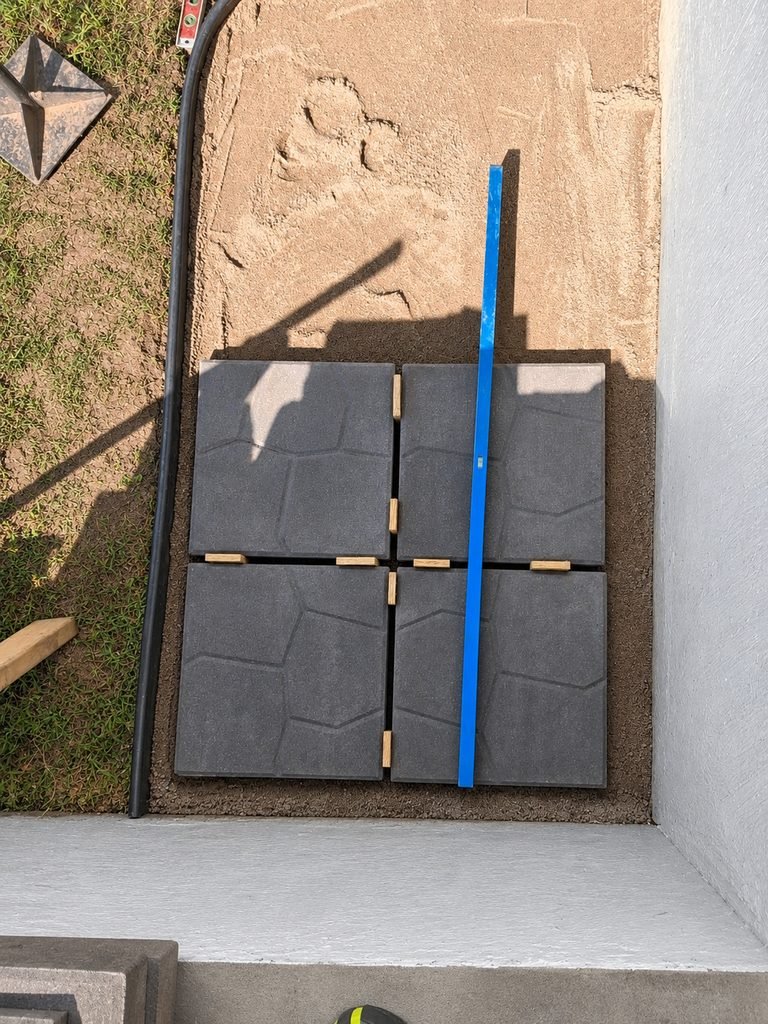
Once the paver sand was in place, I compacted everything again using a hand tamper. I then started laying out the pavers to get the spacing and positioning right.
Early on, I decided I wanted approximately 4 inches of space behind the pavers, which would leave about 2 inches of space along the front and sides. This gave me room for the decorative rock and landscape edging while keeping the pavers positioned where I wanted them.
I used small, 1/2-inch-wide pieces of wood as spacers between the pavers to help keep the gaps consistent while I worked on getting everything lined up.
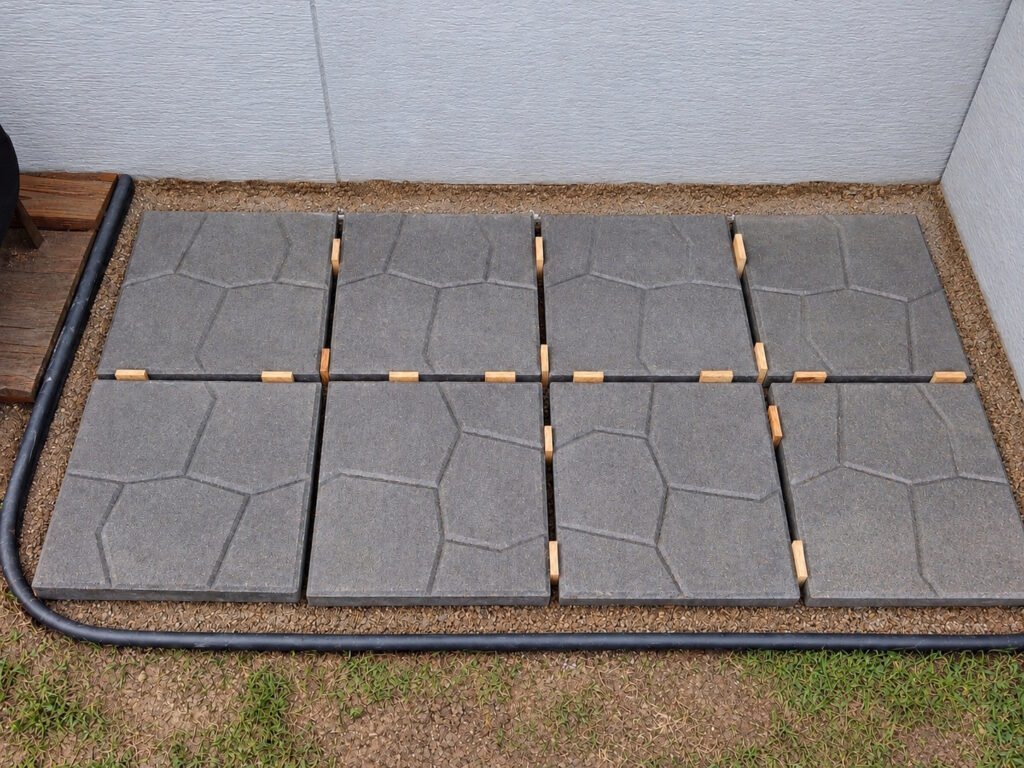
Once I had all the spacers in place and was happy with the final layout, I made one small adjustment. I trimmed a small section off the front-left corner of the paver using an angle grinder fitted with a diamond masonry blade. This allowed me to maintain approximately 2 inches of clearance between the paver and the landscape edging.
When cutting pavers, it’s important to take the proper safety precautions. Wear appropriate eye protection, use a properly fitted respirator to protect against silica dust, and use a compatible dust-control method when cutting. An angle grinder fitted with a diamond masonry blade makes quick work of the material, but it also creates a lot of fine dust, so don’t overlook the safety precautions.
It was a small detail, but it helped keep the spacing consistent and gave me the room I wanted for the decorative rock around the perimeter.
Securing the Pavers and Adding Polymeric Sand
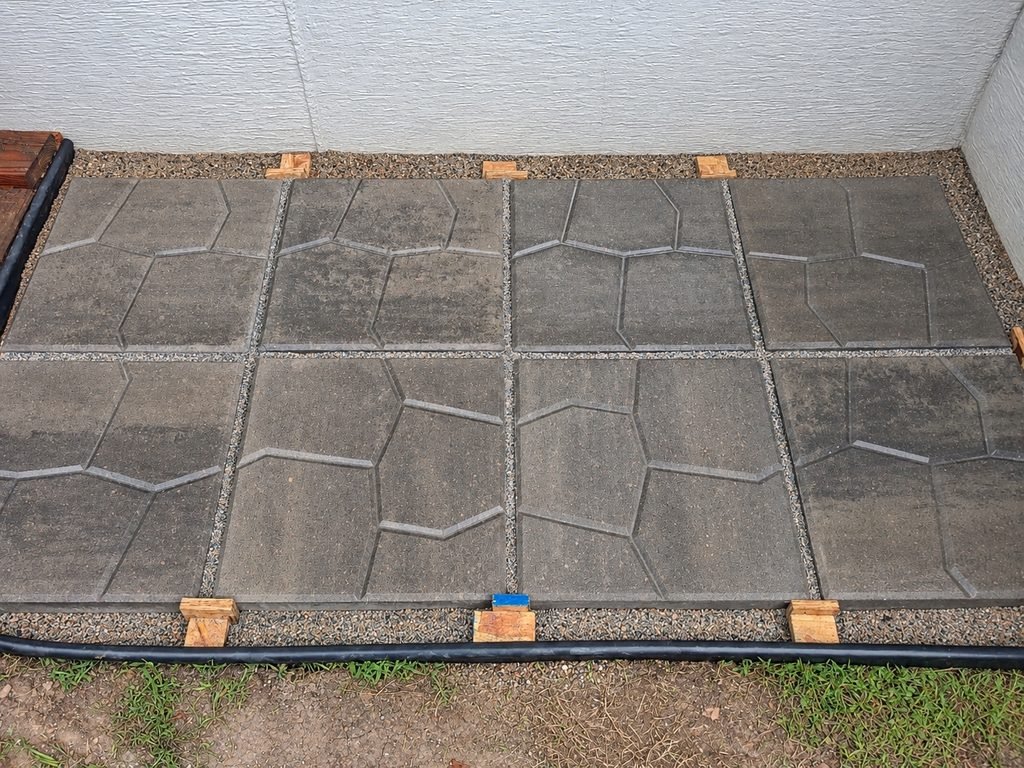
Once I was happy with the layout, I used small pieces of old 1/2-inch plywood as blocking around the outside of the pavers. This helped keep the pavers from shifting and also kept the polymeric sand from falling out of the joints along the edges. I used the same material for the spacers between the pavers. I let the polymeric sand cure for almost 72 hours before removing the plywood blocking and moving on to the next step. The manufacturer’s recommended curing time was 24–48 hours, but I decided to give it some extra time to make sure everything had set properly.
Adding the Landscaping Rock and Backfilling
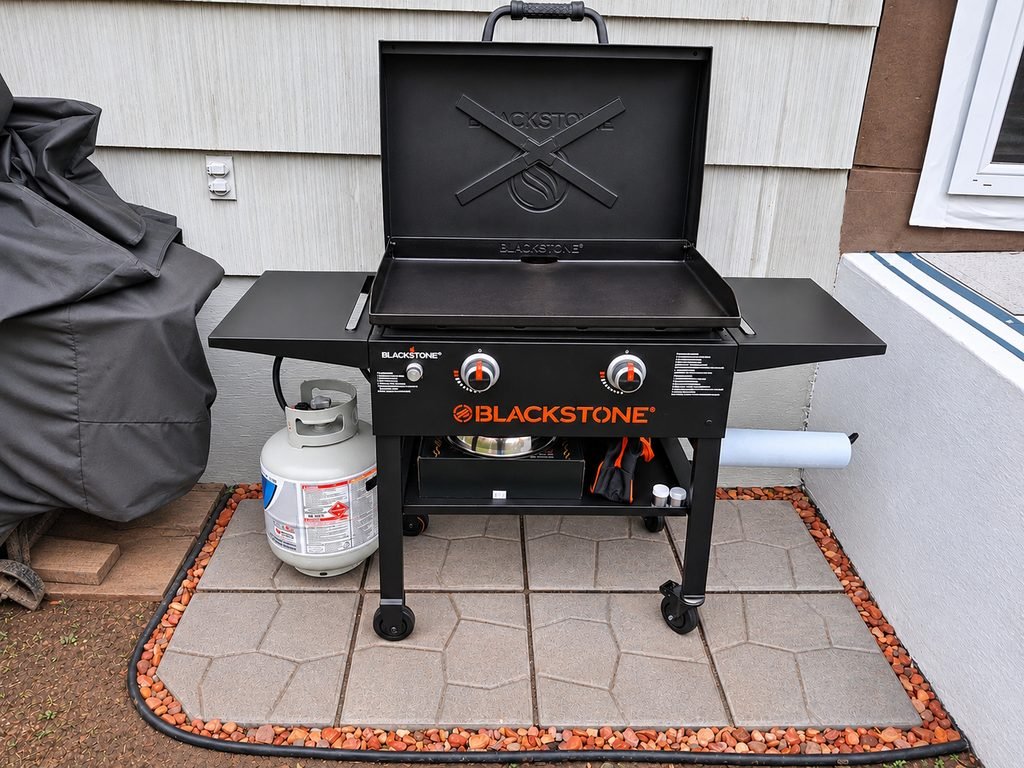
With the pavers secured and the polymeric sand cured, I added the landscaping rock around the perimeter of the pad. This filled in the space between the pavers and the landscape edging and gave the project a more finished look.
I then backfilled the surrounding area with dirt, making sure the ground sloped away from the pad and the house to help direct water away from the foundation.
With everything finished, I rolled the Blackstone into place and the grill pad was ready to use!
What I Would Do Differently Today
I would lay out the pavers first and determine the overall length and width needed for the pad, including the 4 inches of clearance along the back and 2 inches along the remaining sides. I would then use those measurements to determine exactly where the landscape edging needed to go. Doing that ahead of time would have given me a better idea of how everything would fit together before I started installing the edging.
The Finished Grill Pad
The finished grill pad measures 3 feet 4 inches by 5 feet 10 inches, giving the Blackstone a dedicated spot that’s level, stable, and easy to access. What started as a small project turned into a nice addition to the backyard, keeping the grilling area cleaner and more organized. Taking the time to prepare the base and get the pavers level made all the difference.