
Before getting into the renovation, here’s a look at the bathroom layout. The floor plan shows the overall dimensions and the placement of the toilet, vanity, shower, window, and doors. It also shows the HVAC chase along the front of the room.
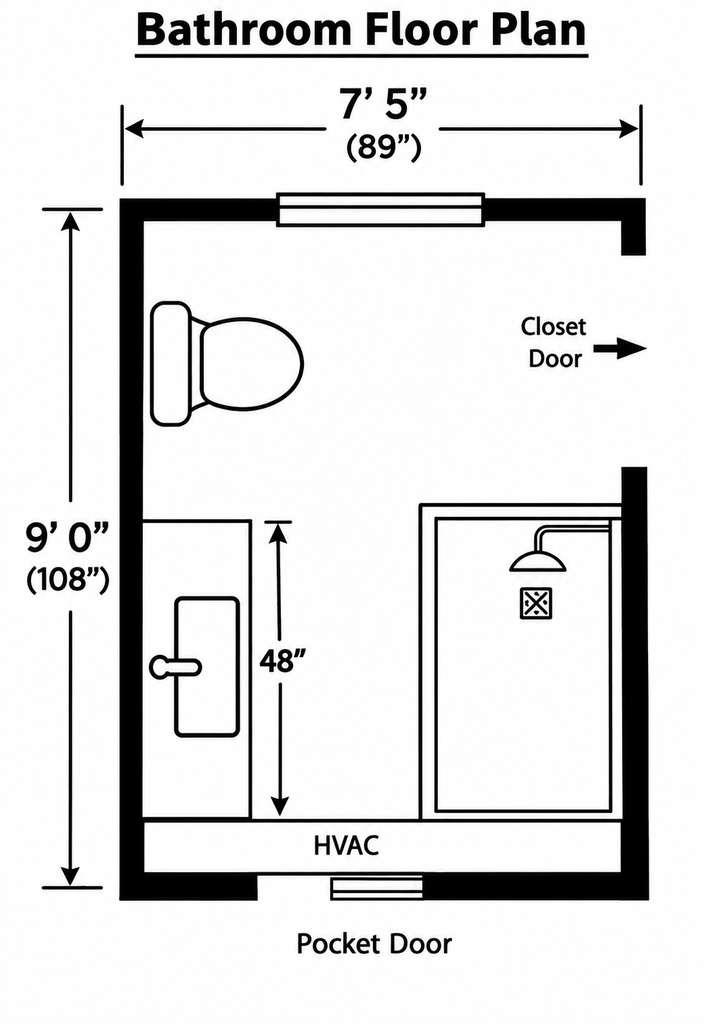
Bathroom floor plan showing the room dimensions and fixture layout.
Every renovation has a starting point, and this basement project was no exception. What began as an empty room became an opportunity to create a functional, comfortable, and attractive bathroom. In this article, I’ll walk you through the transformation, share photos from the project, and explain what I learned along the way—including what I’d do differently today.
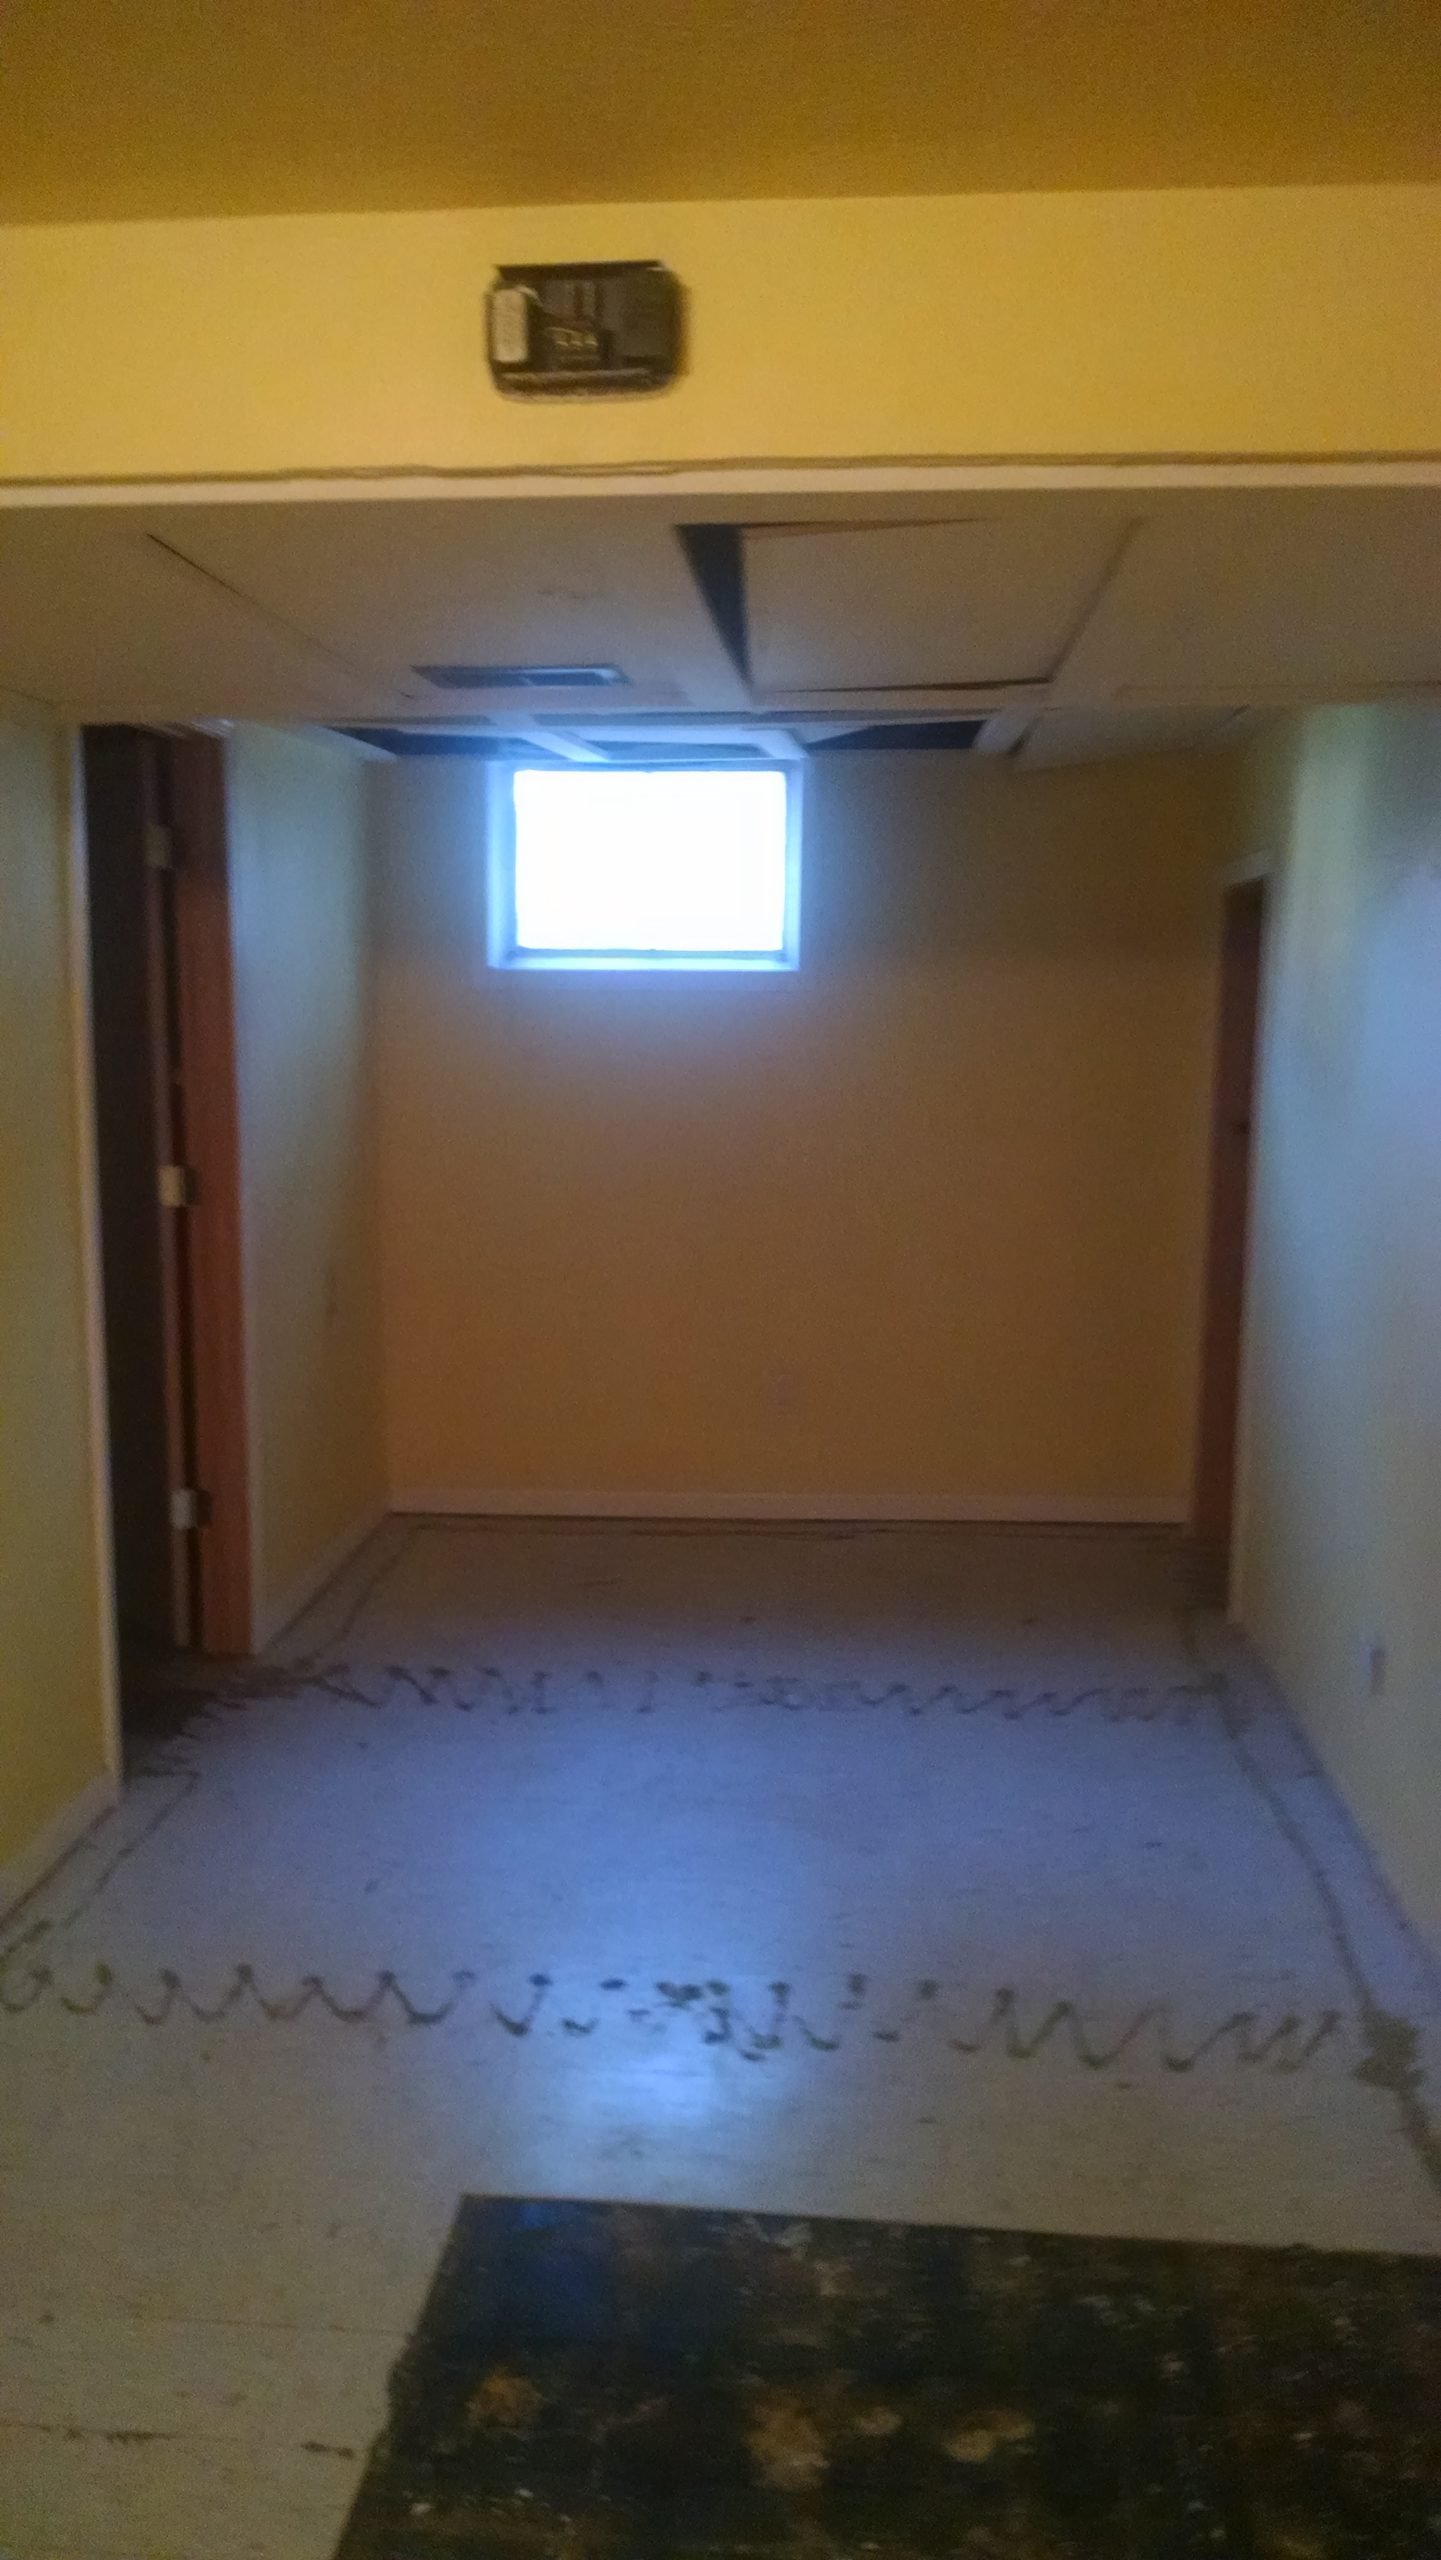
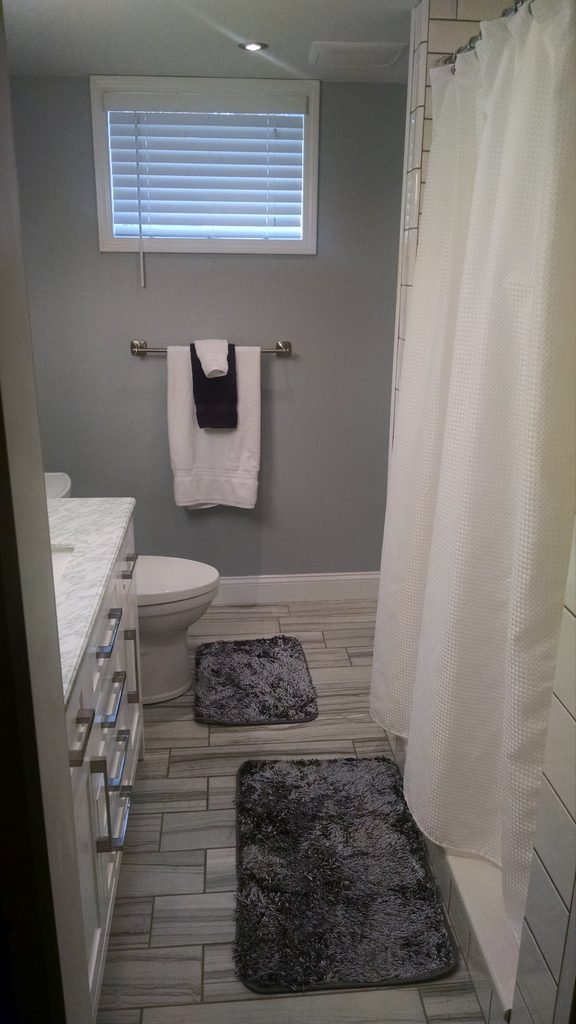
The Before and After
Where It Started
As you can see in the before photo above, the empty basement room had old flooring and a ceiling that needed attention. The renovation started with clearing out the old materials and preparing the space for its transformation.
Safety First: Check for Asbestos
If you suspect asbestos may be present, stop before disturbing the flooring. Have the material evaluated and tested by a qualified asbestos professional. Until you know whether asbestos is present, avoid scraping, sanding, or breaking the material.
If testing confirms asbestos is present, don’t attempt ordinary DIY removal. Consult a qualified asbestos professional about safe handling and applicable local requirements.
For additional guidance, see the EPA’s recommendations for protecting your family from asbestos exposure.
Removing the Old Tile
After documenting the original condition, I began removing the old tile. Since it had been glued directly to the concrete, getting it up was more difficult than expected.
After removing the first few tiles, I decided to pause demolition and send a sample of the old flooring to Environmental Testing Laboratories (ETL) for testing. Once the results came back negative for asbestos, I continued removing the remaining tile and adhesive.
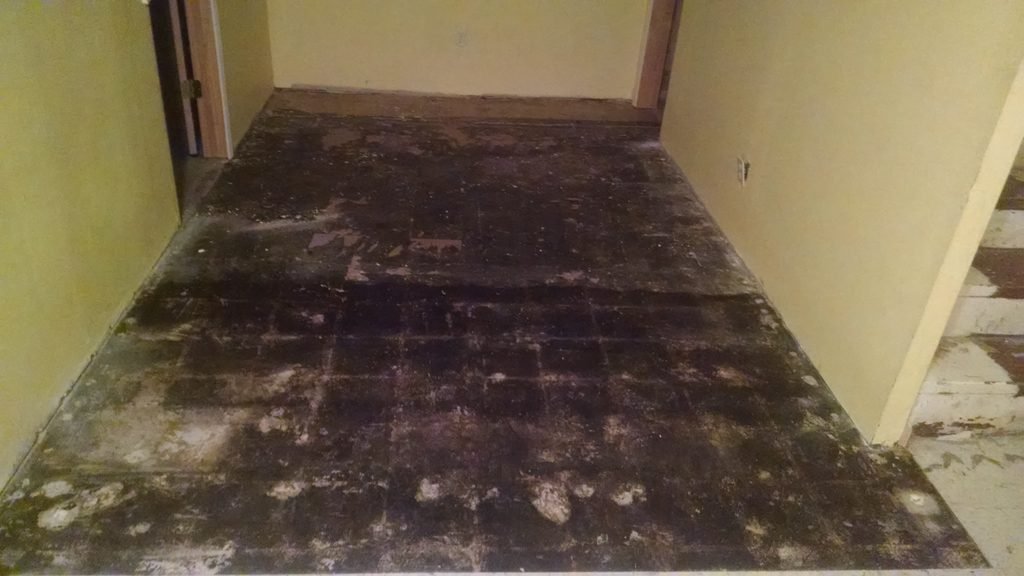
Once the tiles were up, the real challenge was scraping the remaining adhesive off the concrete. I used old clothes irons and putty knives to tackle the job, but it was slow, hands-on work. Clearing the old flooring was an important first step toward giving the bathroom a completely new look.
Opening Up the Walls
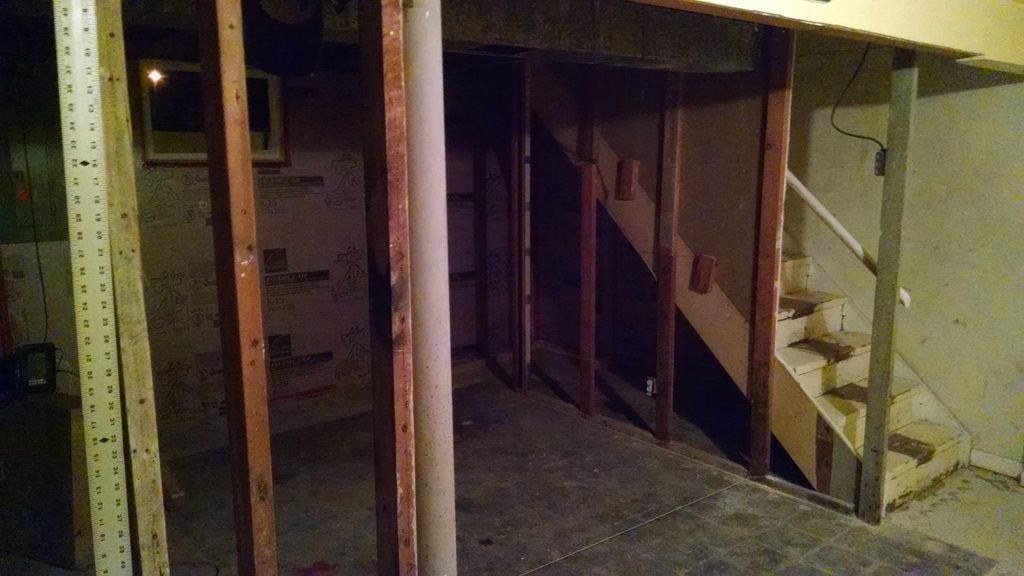
When I removed the original framing, I discovered that there was no insulation behind the walls. Before installing anything, I checked the concrete foundation wall for moisture to see whether water was seeping through and whether any additional sealing was needed.
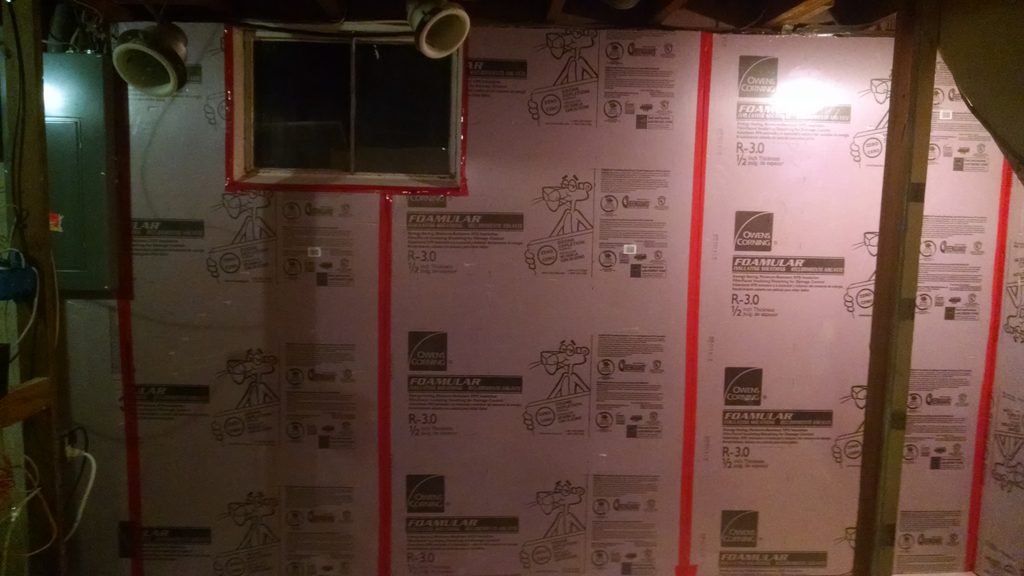
After checking the wall, I installed rigid foam insulation. This was an important step in addressing what had been missing behind the original walls before moving forward with the renovation.
Replacing the Basement Window
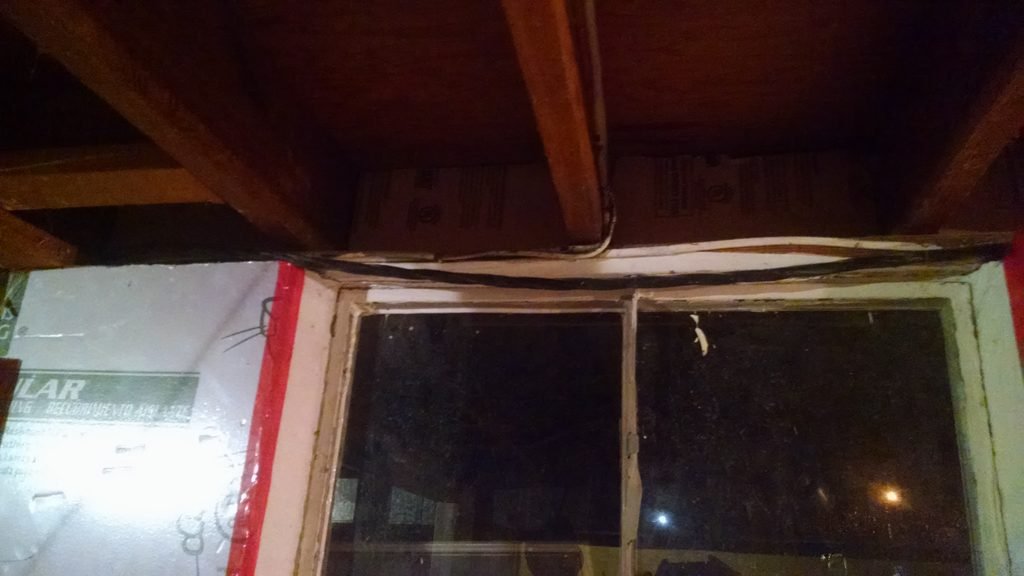
Replacing the basement window turned out to be more involved than simply removing the old window and putting in a new one. The existing metal frame was embedded in the concrete, so I had to use a metal-cutting blade to cut through it before I could pry it out.
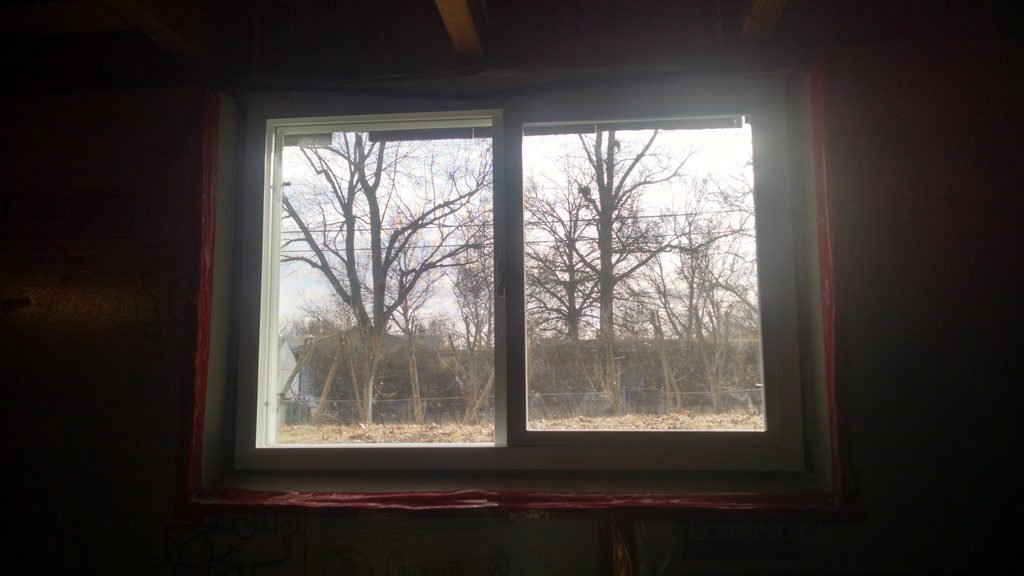
Once the old frame was removed, I positioned and leveled the replacement window using shims, then secured it with concrete screws. After the window was firmly in place, I applied silicone caulk around both the interior and exterior to seal the edges against drafts and moisture.
Repairing the Concrete Floor
With the original walls removed, I could get a better look at the concrete foundation and floor. I discovered several holes in the foundation that needed attention before I could move forward.
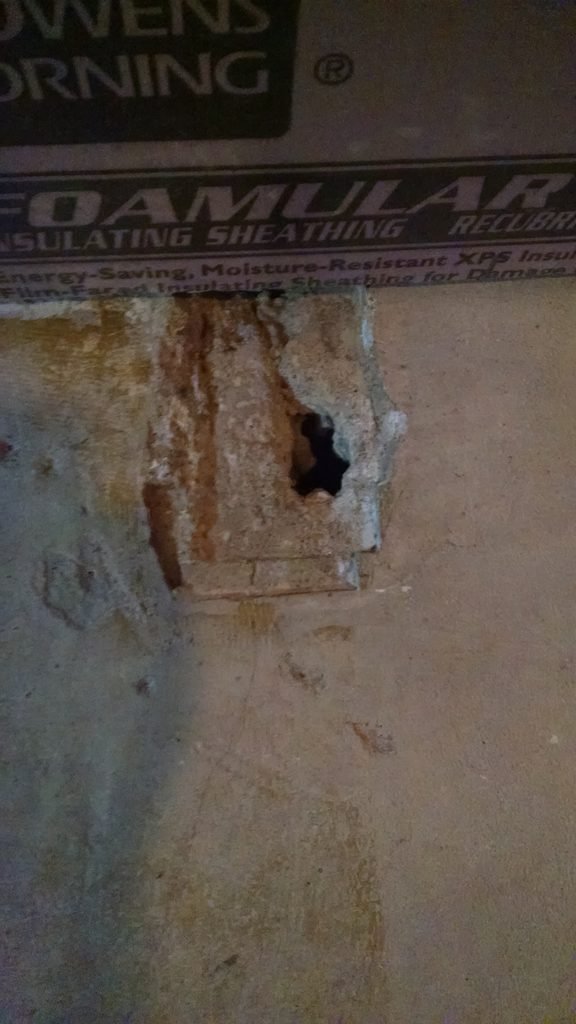
I used a concrete bonding agent and concrete mix to patch the damaged areas. Taking care of these repairs early gave me a better starting point for the next stages of the renovation.
Checking the Floor for Slope
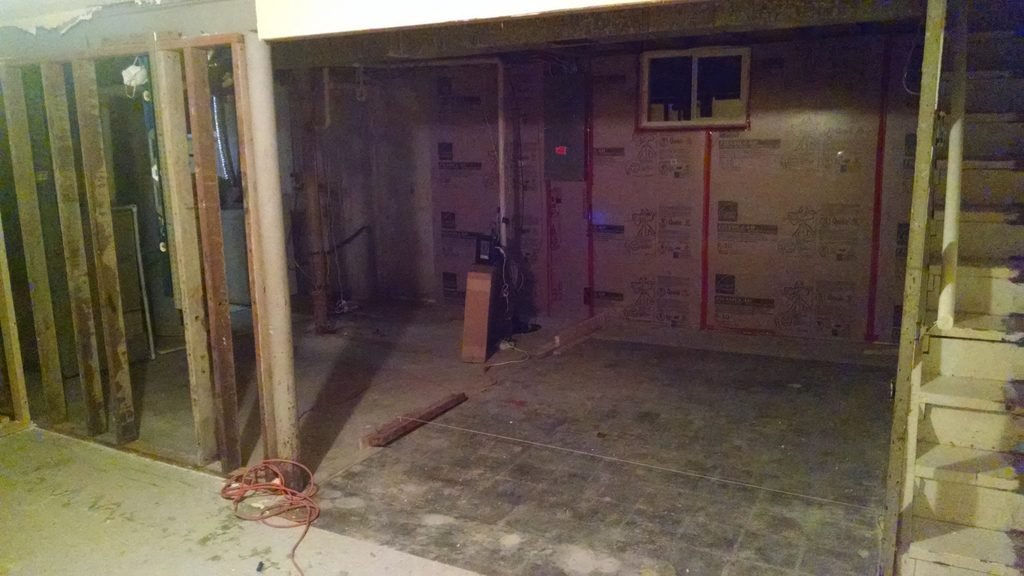
After making the repairs, I used a string level to check the floor’s slope. Understanding the condition of the concrete floor would help me determine what needed to be addressed before moving forward with the new flooring and rebuilding the walls.
Planning and Cutting for the New Plumbing
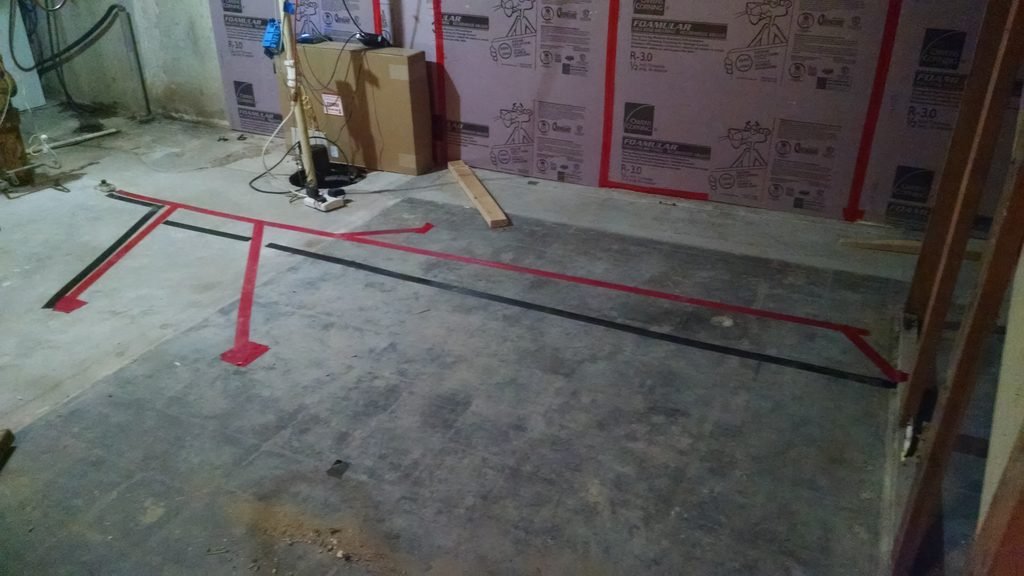
Before installing the new plumbing, I needed to determine where the pipes would run beneath the concrete floor. I laid out the proposed plumbing routes directly on the floor, using red lines to mark the waste pipes and black lines for the vent. The layout changed slightly as the plans were finalized, but marking everything out gave me a clear starting point.
Preparing for the Concrete Dust
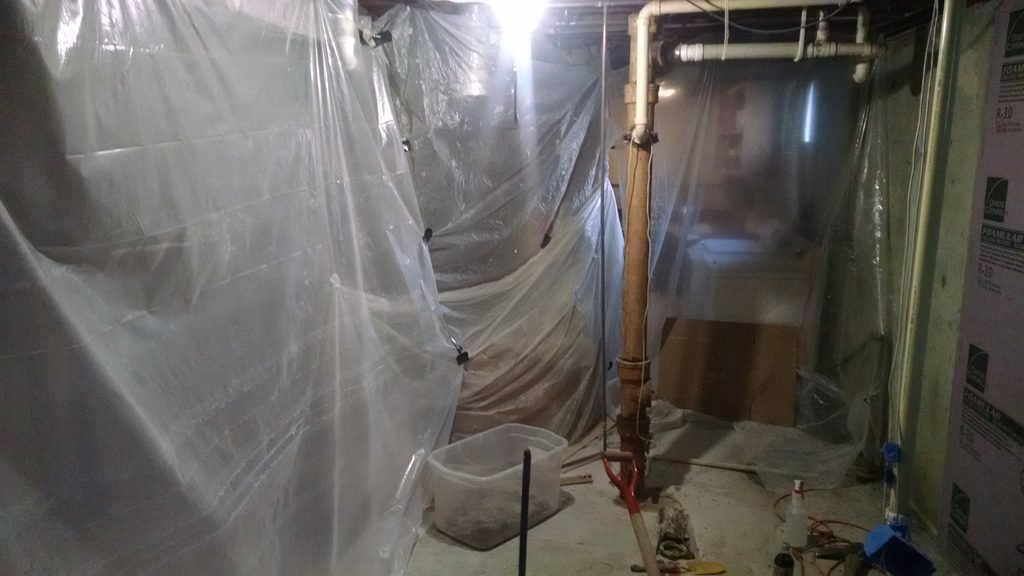
Before cutting into the concrete, I took steps to keep the dust contained as much as possible. I covered the surrounding areas with plastic sheeting to help prevent dust from spreading throughout the house. I also opened the basement windows for ventilation and shut off the HVAC system to keep dust from being circulated through the ductwork.
Wear proper eye protection, a properly fitted NIOSH-approved respirator suitable for concrete dust, and long sleeves. Concrete dust gets everywhere, so avoid carrying it into the rest of your house. Change out of dusty clothes carefully, and keep heavily dust-covered clothing separate from your regular laundry.
Take breaks, too. Working behind plastic sheeting while wearing protective gear and operating heavy equipment can get hot and exhausting. Don’t rush the job. Step outside for fresh air, drink plenty of water, and allow airborne dust to settle before returning. Use proper dust-control and cleanup methods to avoid stirring settled dust back into the air.
Cutting the Concrete
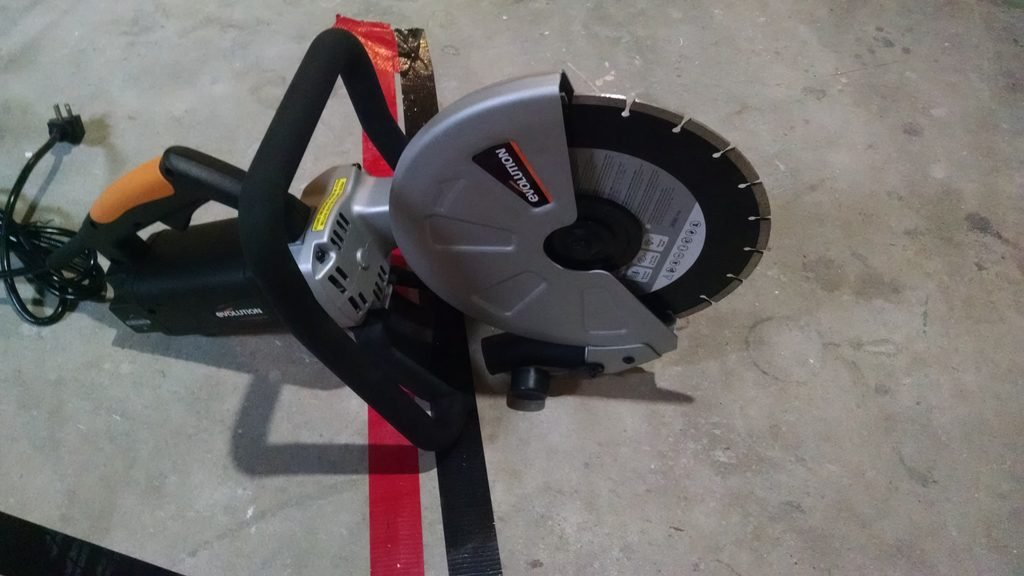
With the plumbing routes marked, it was time to cut into the concrete. I purchased a concrete saw for the job and began cutting along the marked lines.
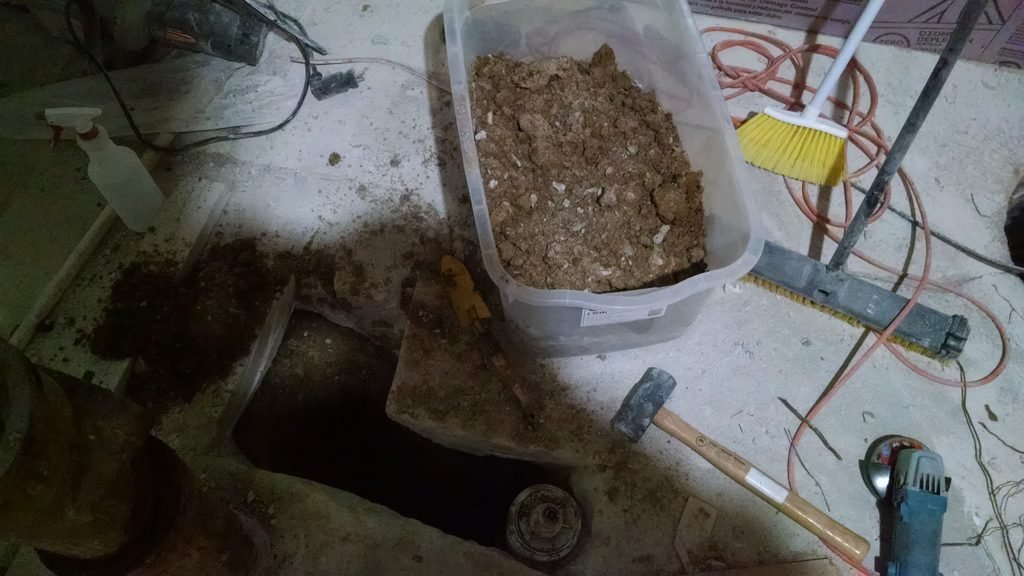
Once the concrete was cut, I broke it into manageable pieces using a sledgehammer and removed the debris from the basement. Much of the concrete had to be carried out in buckets, making repeated trips upstairs and outside to clear the area for the plumbing work.
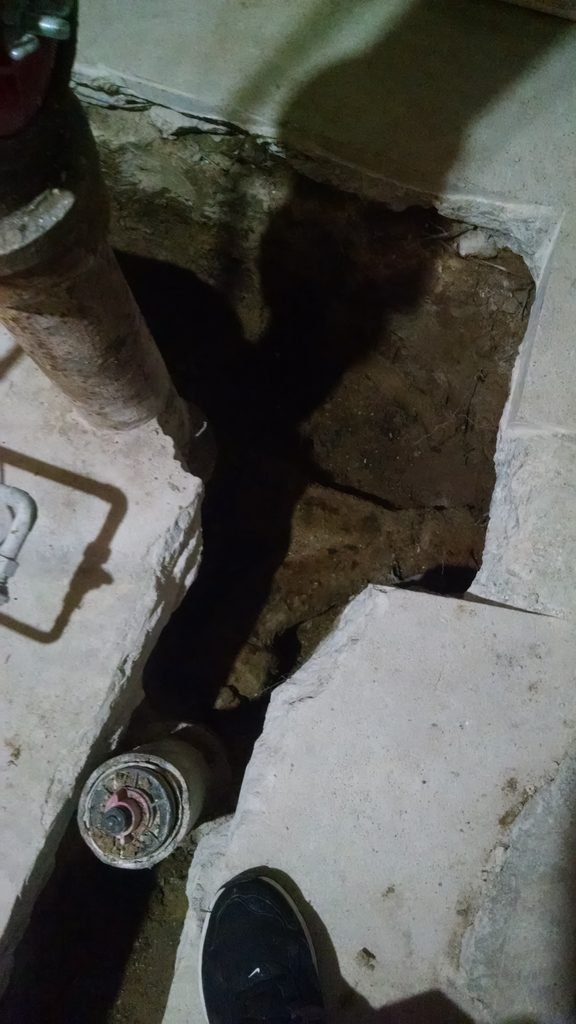
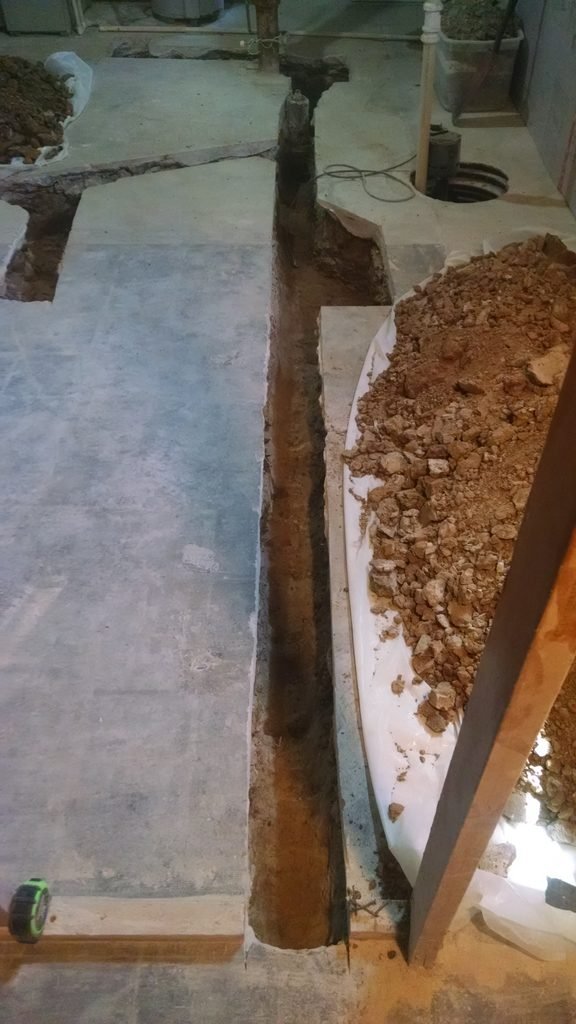
Once the concrete was removed, the next step was digging out the soil underneath. I used a small spade to loosen and remove the dirt by hand. In the narrower sections of the trench, I had to switch to smaller hand tools to get into the tight spaces. It was slow, physical work, but it allowed me to gradually open up the trench to the depth and width needed for the new plumbing.
Removing the Cast-Iron Stack
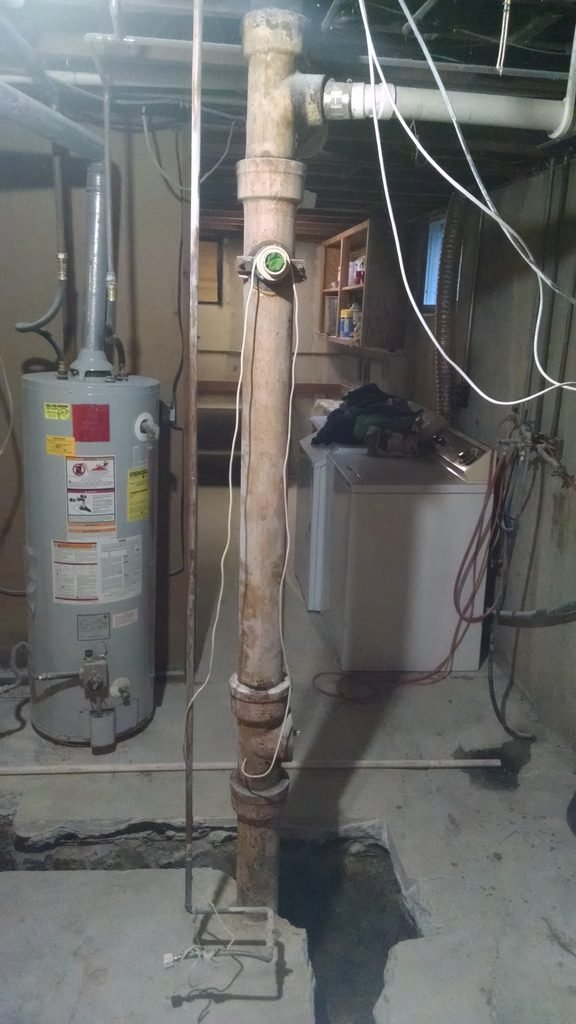
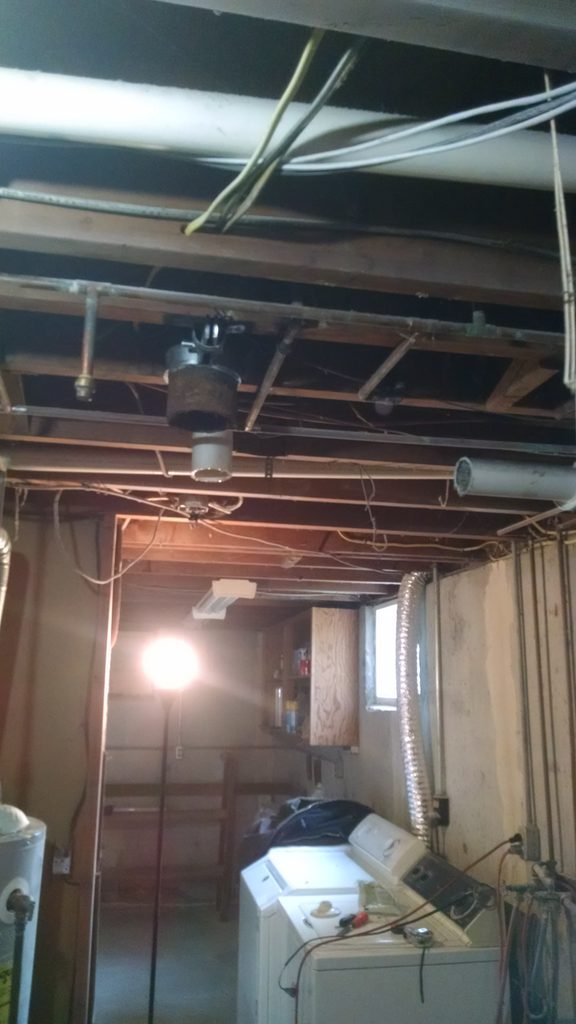
The next step was removing the existing cast-iron plumbing stack to make way for the new plumbing layout. I hired a local plumbing company to handle this part of the project. Removing a cast-iron stack wasn’t something I had experience with, and I didn’t want to risk damaging the existing plumbing or creating a bigger problem.
Installing the New Drain Lines
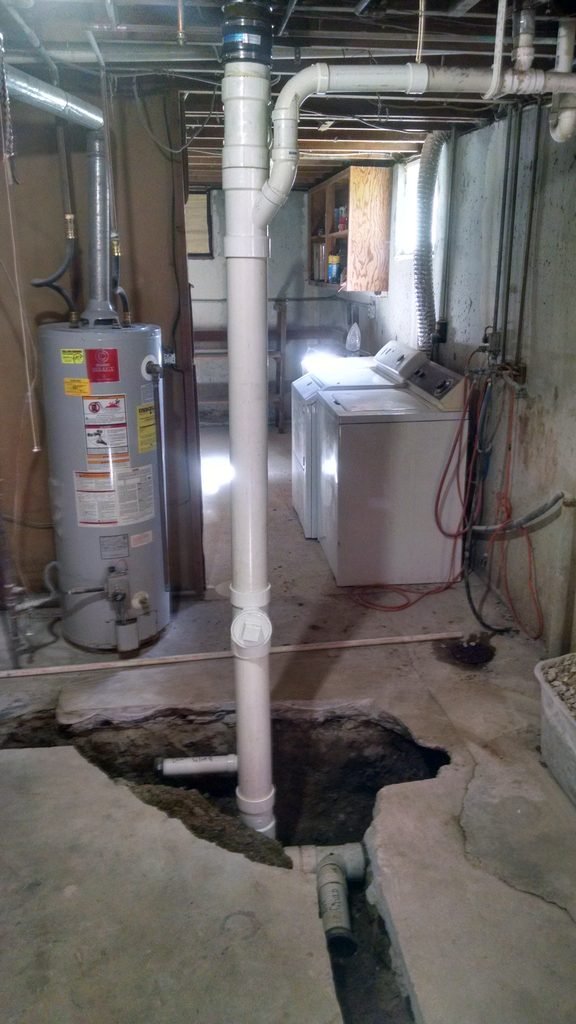
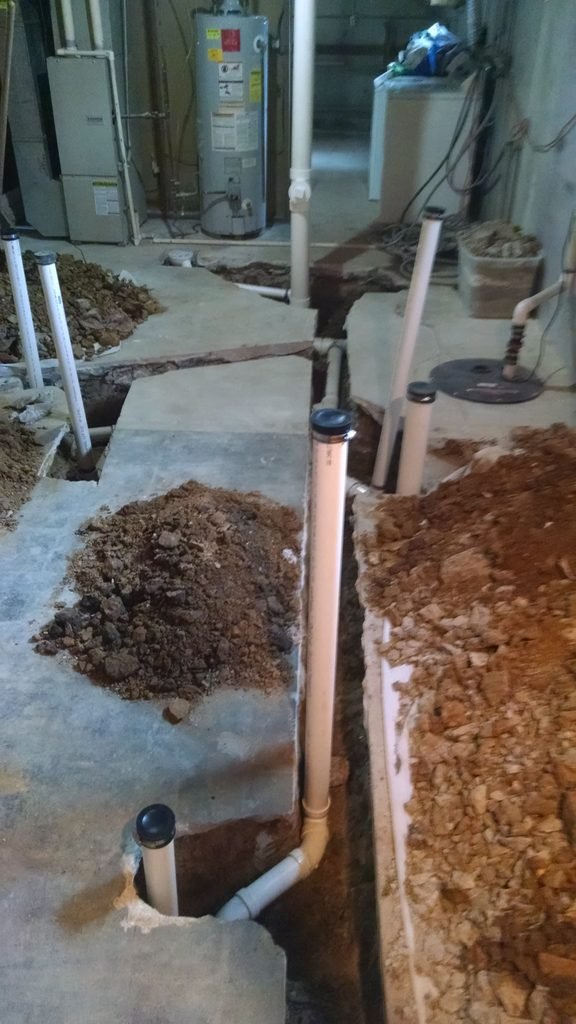
They installed the new main stack, connected it to the existing sewer line, and left the necessary stub-outs for the rest of the plumbing. From there, I took over the remaining work and began installing the drain lines for the new bathroom layout. As I worked through the individual plumbing locations, I kept the open lines capped until the final connections were made to help prevent sewer gases from entering the house.
With the main connection in place, I could focus on bringing the new plumbing layout together.
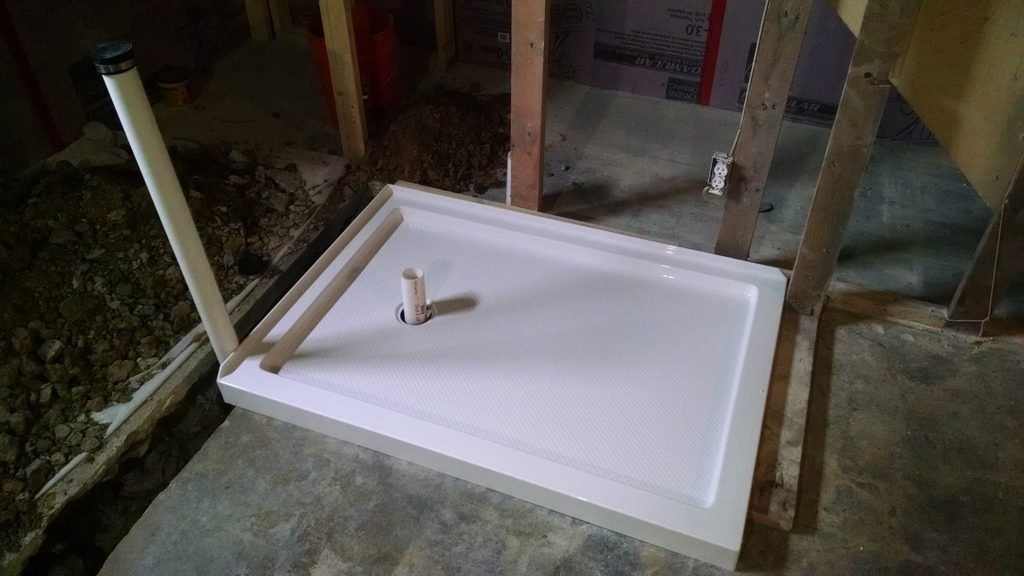
Before finalizing the shower plumbing, I test-fitted the shower pan to make sure the drain lined up properly and the vent pipe was positioned where it needed to be. This gave me a chance to check the layout against the actual pan before moving on to the next stage.
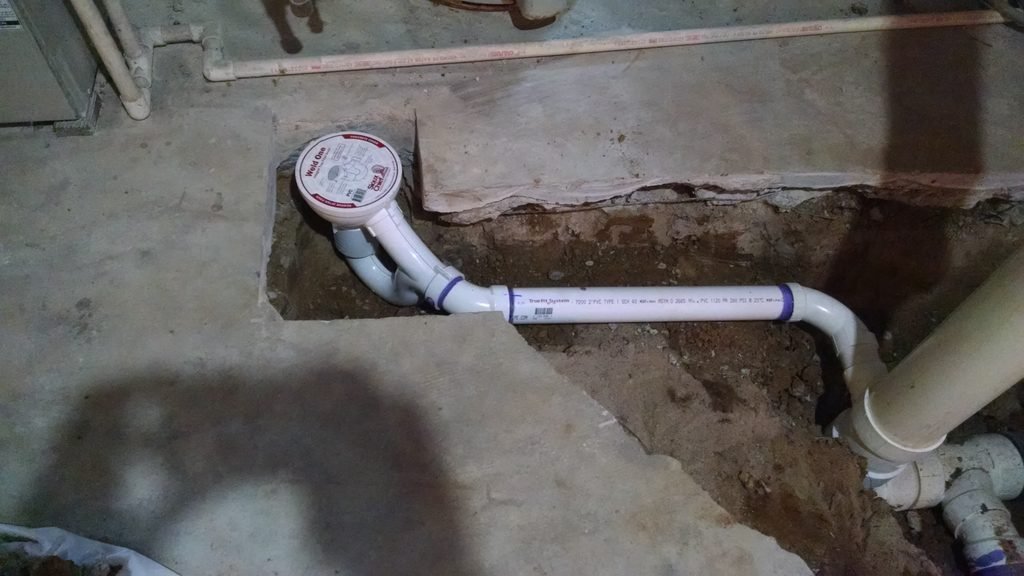
As I installed the remaining drain lines, one of the most important things I had to get right was maintaining the proper slope. For this project, I used a downward pitch of ¼ inch per linear foot to help wastewater flow properly through the pipes. Getting the slope right was especially important because these drain lines would be buried beneath a concrete floor. Once the concrete was poured, correcting a drainage problem could mean cutting the floor open all over again.
I also paid close attention to making the PVC connections properly. The pipe and fittings need to be prepared with primer and solvent cement to create secure, leak-resistant joints. You can see the purple primer around several of the connections in this photo. Getting the slope and connections right before covering everything up can save a lot of trouble down the road.
Backfilling the Trenches and Replacing the Concrete
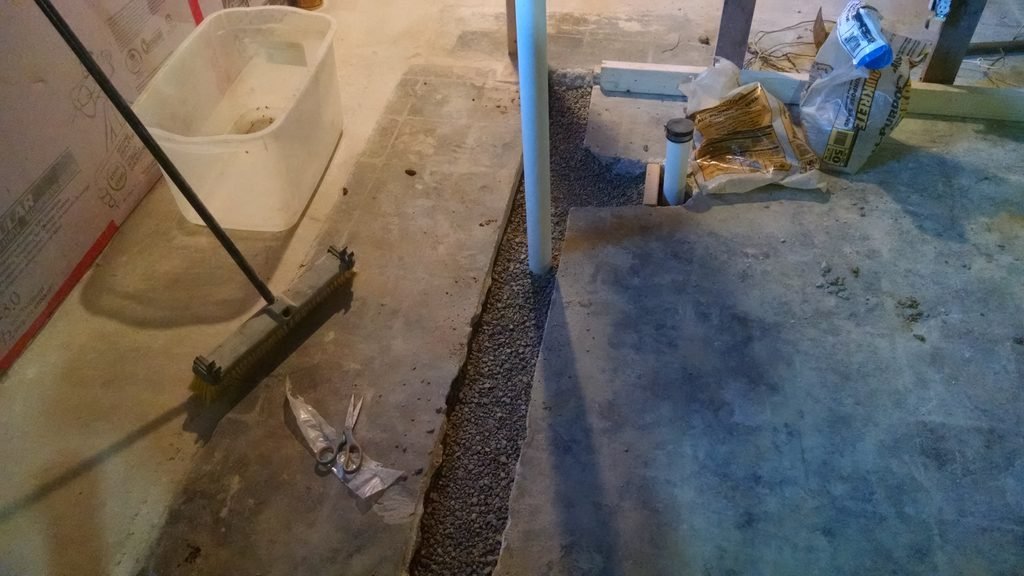
With the plumbing installed and checked, it was time to start putting the floor back together. I filled the trenches with sand and gravel around the new plumbing, bringing the fill up to the level needed before replacing the concrete.
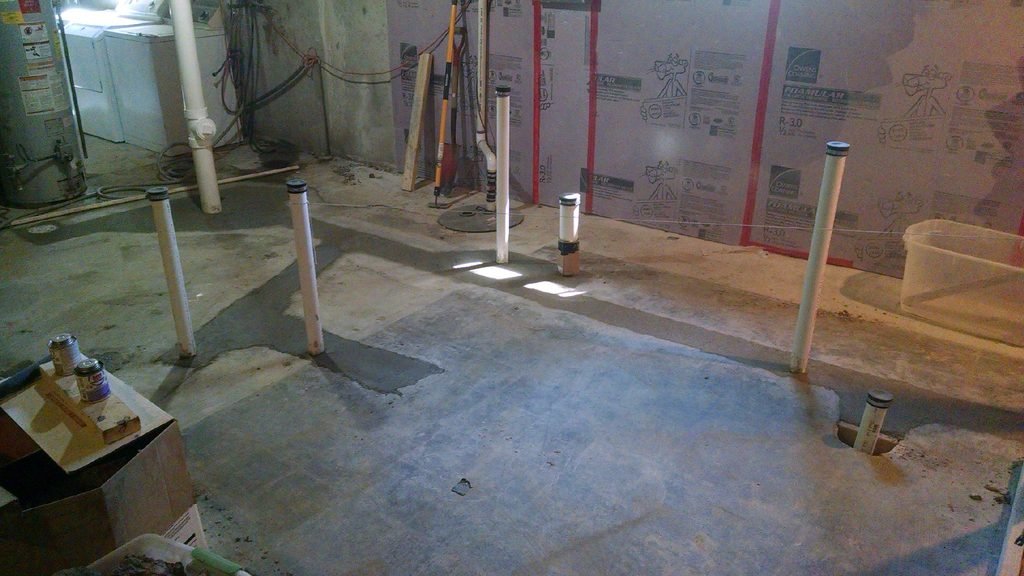
I mixed the concrete on site using a wheelbarrow, working in batches to fill the trenches and cover the newly installed plumbing. It was physically demanding work, especially after all the digging and plumbing that had come before it, but gradually the trenches began to disappear beneath the new concrete.
Once the concrete was in place, I made sure the plumbing stub-outs remained exposed and accessible for the next stages of the renovation. Seeing the floor restored and the trenches filled was a major milestone. After all the work that went into getting the plumbing installed, it was nice to finally start putting the floor back together.
Framing the New Bathroom
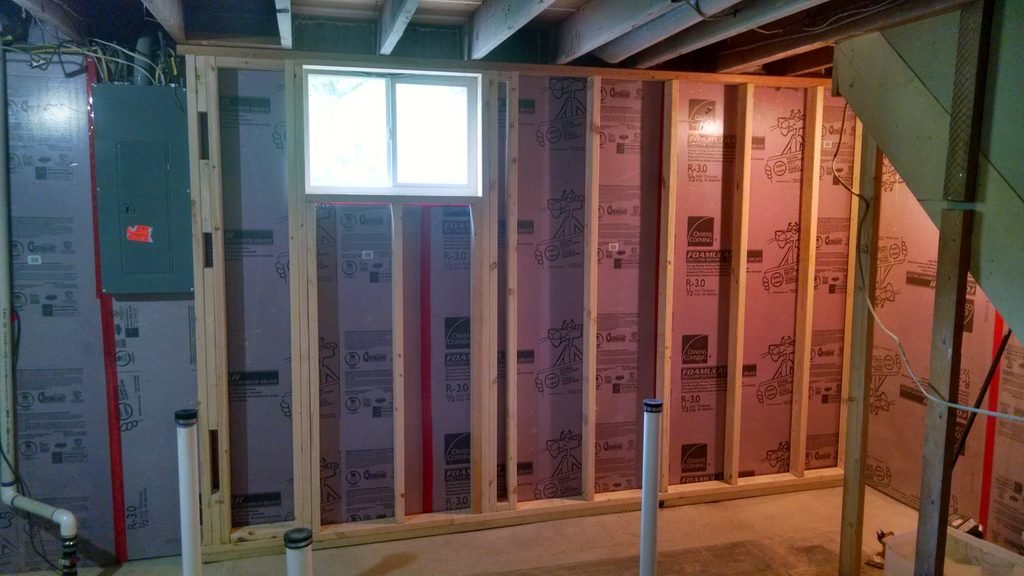
With the plumbing rough-in complete and the concrete floor restored, it was time to start framing the new bathroom. I began with the back wall, working around the existing basement window and building out the wall that would help define the new space.
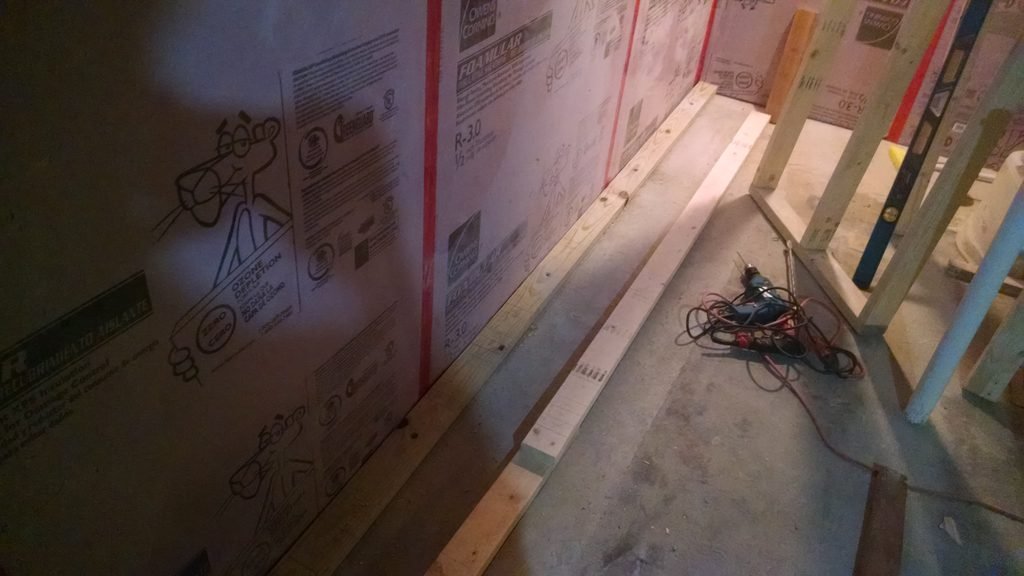
When framing on a concrete floor, one important detail is to use pressure-treated lumber for the bottom plates that sit directly against the concrete. Concrete can transfer moisture to wood over time, so pressure-treated 2x4s help protect the framing from moisture-related damage. I used concrete anchors to secure the bottom plates to the floor, drilling into the slab with a hammer drill before fastening them in place.
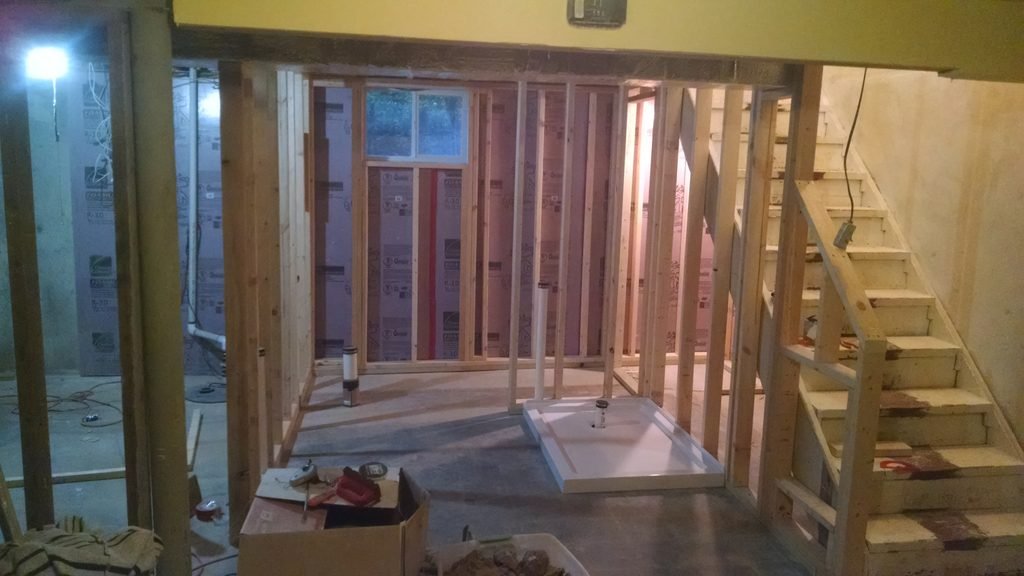
With the back wall in place, I continued framing the remaining walls to establish the new bathroom layout. This included defining the areas for the shower, vanity, and toilet. As the framing came together, it was finally possible to see the new room taking shape.
Framing the Closet and Installing the Pocket Door
With the main bathroom walls framed, I moved on to building the closet enclosure and preparing the opening for the pocket door. This helped define the separate spaces within the bathroom while keeping the overall layout open and functional.
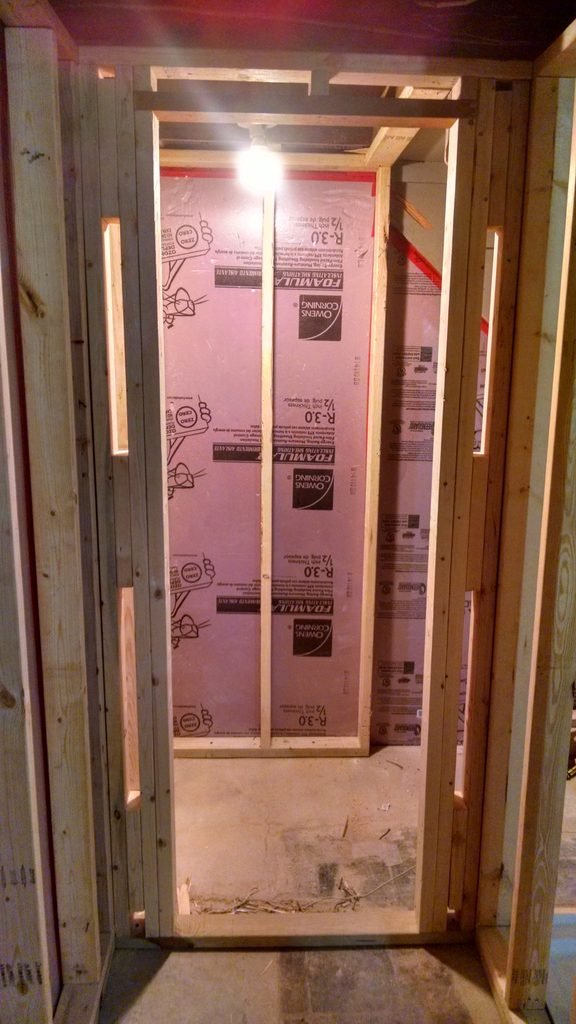
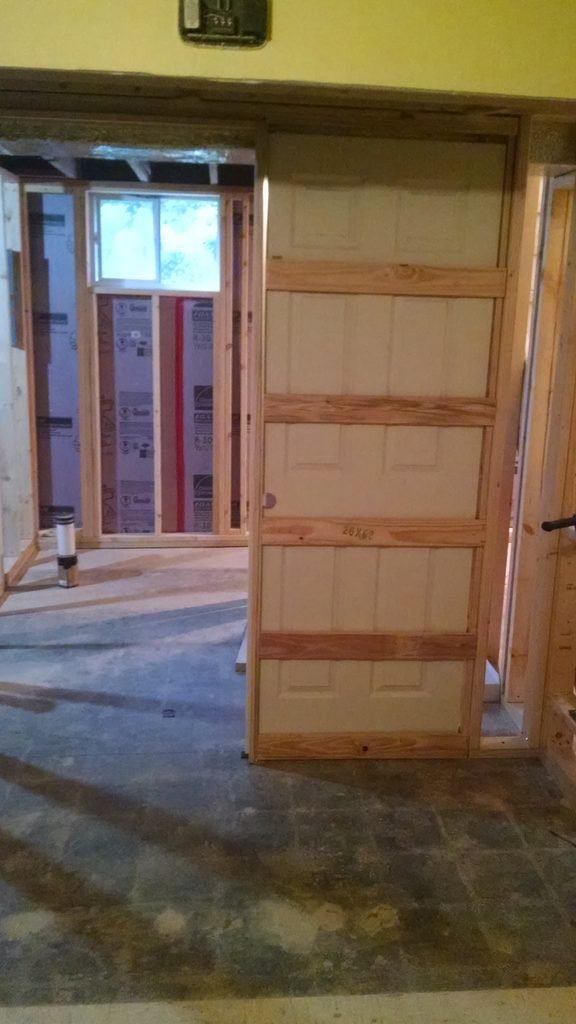
A pocket door was really the only practical option for this area. The existing ductwork prevented the door from swinging inward, while an I-beam overhead restricted the space needed for it to swing outward. By installing a pocket door, I was able to work around both obstacles without sacrificing valuable floor space. It also kept the doorway clear and made the bathroom layout more functional.
Leveling the Shower Floor
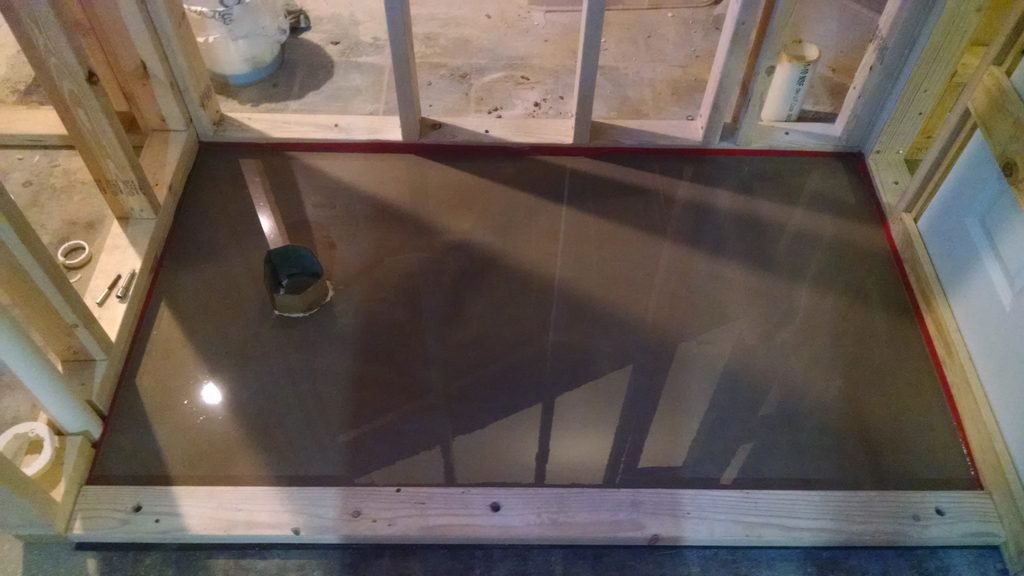
Before installing the shower pan, I needed to make sure the floor beneath it was level. I used a self-leveling compound to create an even surface for the pan to sit on.
While pouring the compound, I placed a round barrier around the pipe opening to keep the material from flowing down into the pipe. Once the compound was spread and allowed to cure, it created a solid, even base that was ready for the next step.
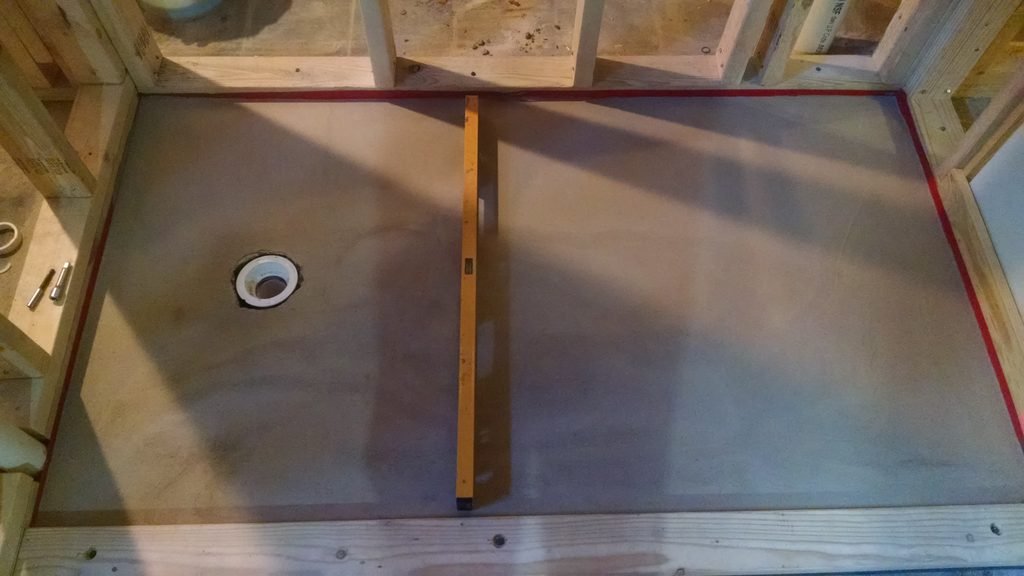
Getting this area level was important because the shower pan needs consistent support underneath to sit correctly and remain stable. It also helps ensure the pan is positioned properly so its built-in slope can direct water toward the drain.
Framing the Shower Bench
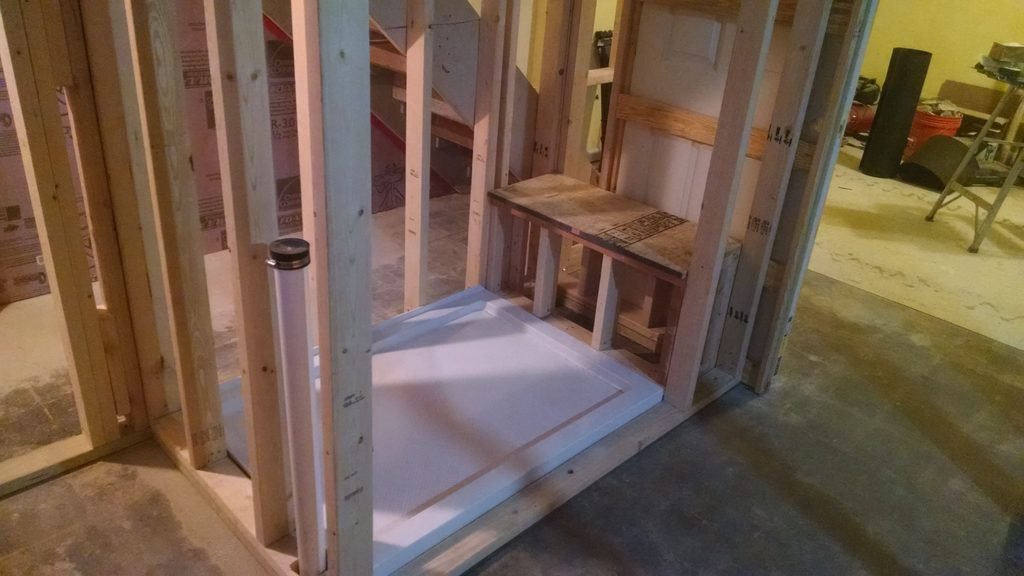
After completing the plumbing and preparing the shower floor, I installed the shower pan in its final position. With the pan in place, I continued building out the shower area by framing a built-in bench along the back wall. I wanted to include a place to sit without taking up more room than necessary.
I built the bench frame to fit the available space, adding vertical supports to create a sturdy base. I also made sure the top of the framing was sloped slightly toward the shower drain so water wouldn’t collect on the finished bench. This established the structure for the bench before moving on to the next stages of the shower installation.
Plumbing the New Bathroom
Continuing the DWV Plumbing
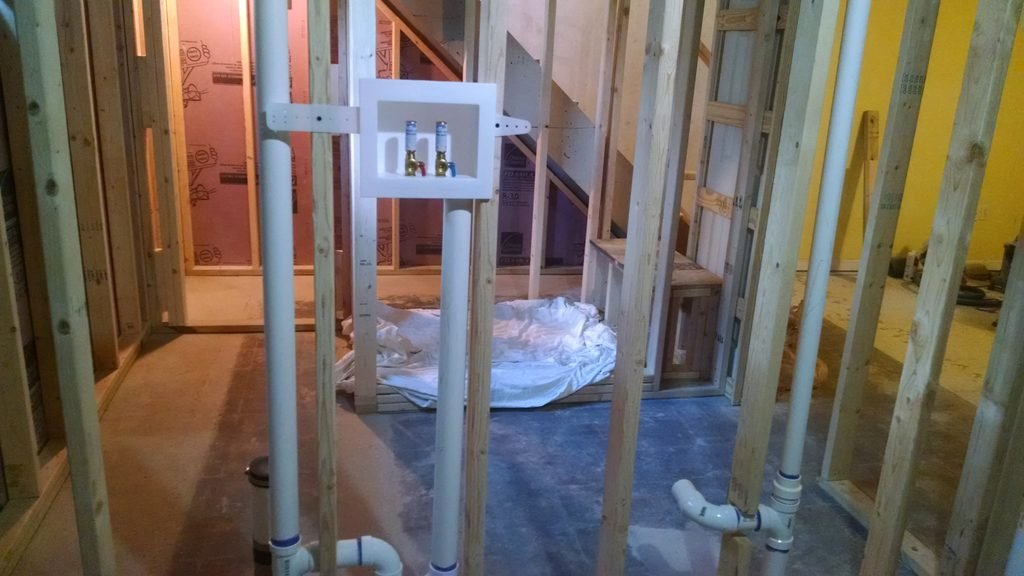
While continuing the plumbing work, I added a washing machine valve and outlet box in the utility room to prepare for eventually moving the washer and dryer to that wall. I also began installing the drain stub-outs for the new vanity. Taking care of both at this stage helped prepare the utility room and bathroom for their future plumbing connections.
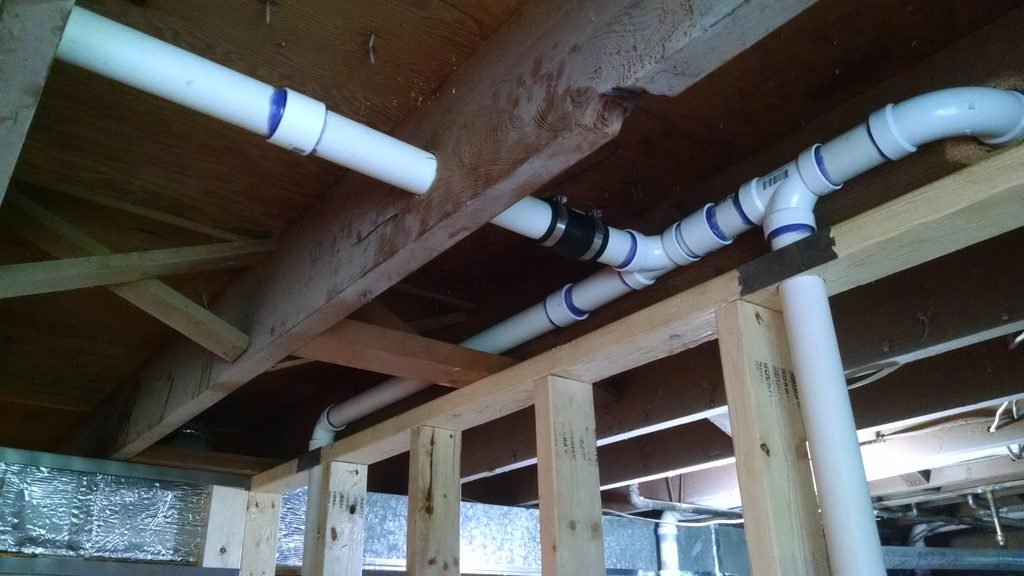
I then continued installing the vent piping overhead as part of the DWV (Drain, Waste, and Vent) system. The vent piping allows air into the drainage system to help maintain proper flow and prevent pressure issues.
Routing the pipes through the floor joists required some planning. When drilling through joists, it’s important to follow proper sizing and placement guidelines to avoid compromising their structural strength. Holes must be located within the permitted area of the joist and sized appropriately for the pipe being installed.
Running the PEX Water Lines
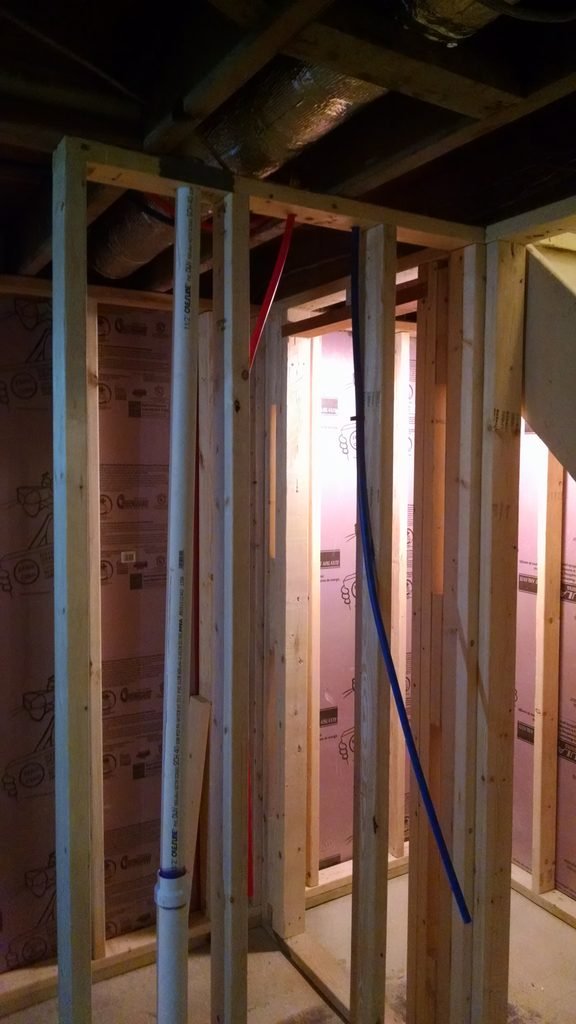
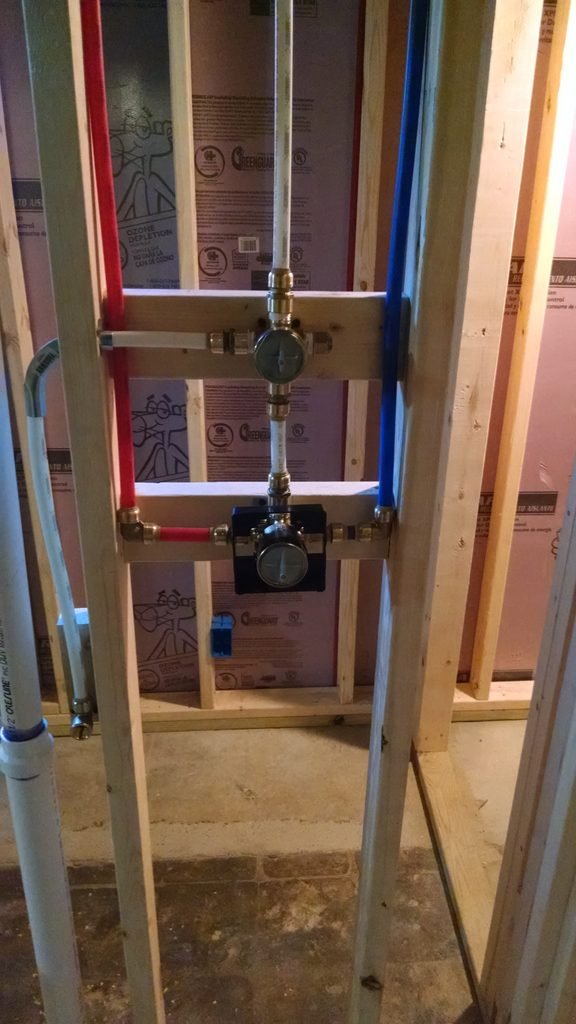
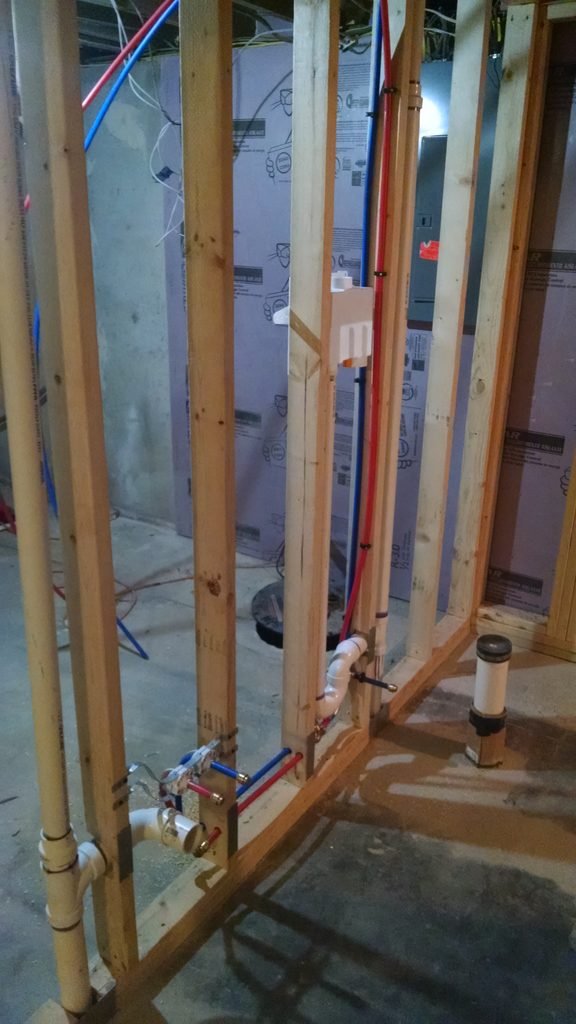
With the drain and vent piping taking shape, I moved on to installing the water supply lines. I ran red and blue PEX tubing through the framed walls, routing the hot and cold water lines to the planned locations for the vanity, toilet, and shower.
At the shower, the hot and cold supplies connect through a mixing valve, which blends the water to the desired temperature. White PEX lines carry the mixed water from the valve toward the shower outlets.
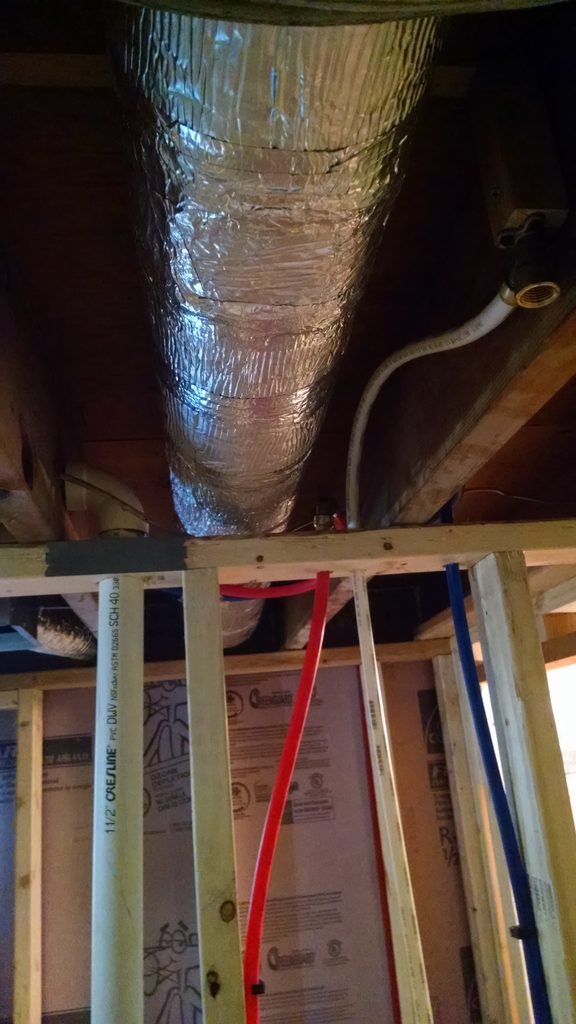
I also ran a water supply line between the floor joists to accommodate the rainfall showerhead I had planned from the beginning. This required carefully routing the line around the existing ductwork and other obstacles.
Once all the water lines were in place, I capped the open ends to protect them until the vanity, toilet, and shower fixtures were ready for installation.
The lines would eventually connect to a centralized Manabloc distribution system, which I’ll cover in a separate article.
Electrical Rough-In
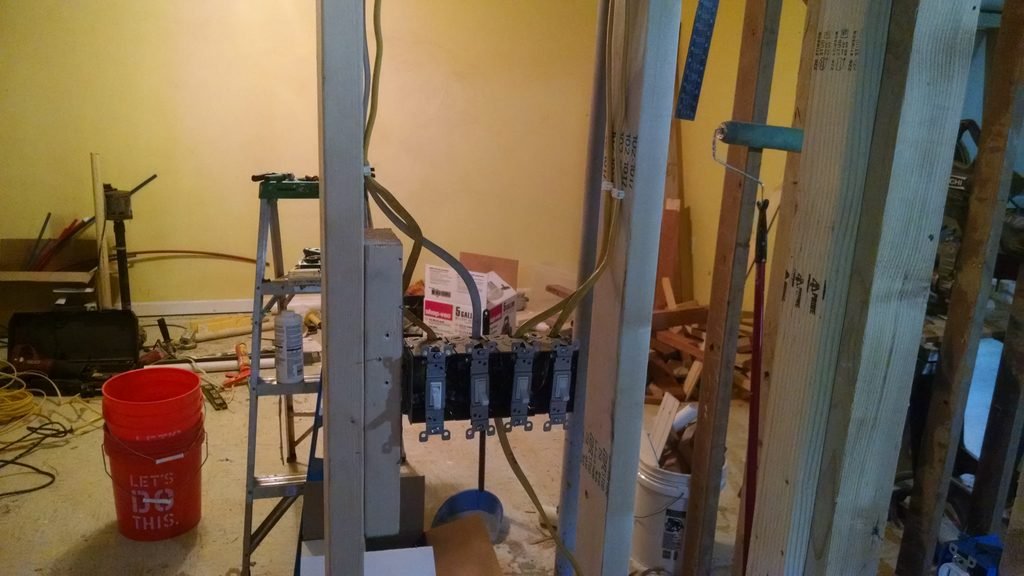
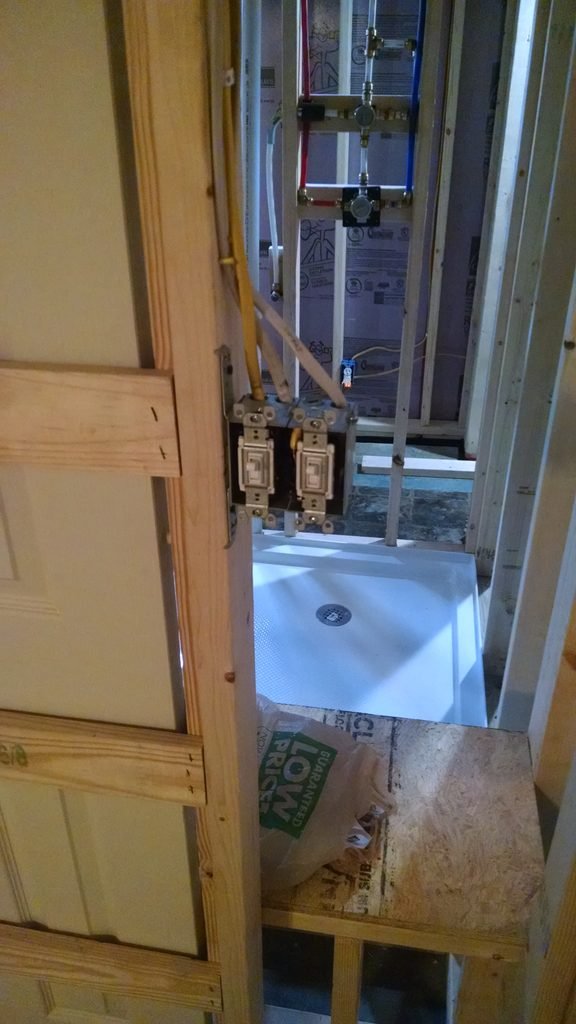
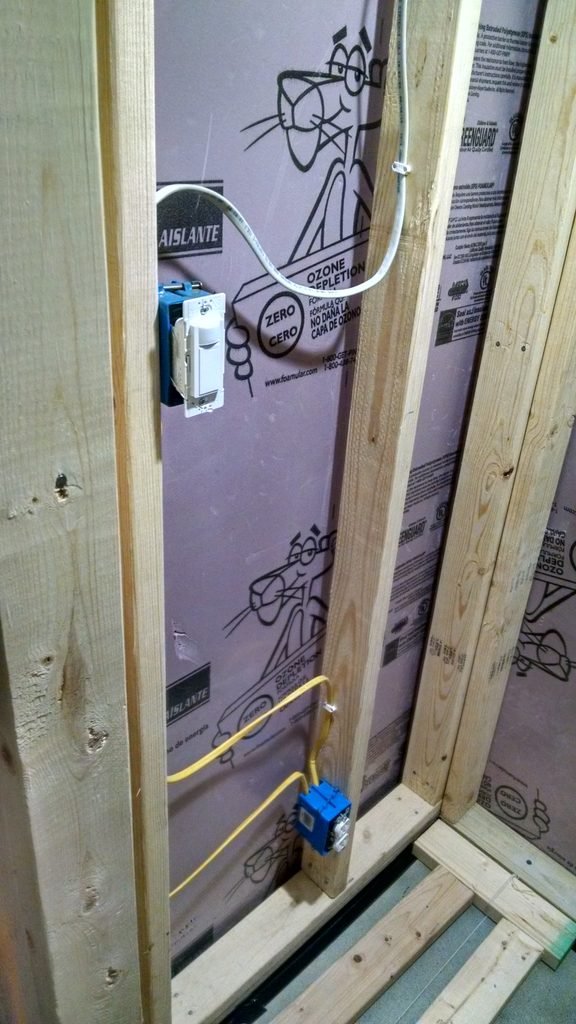
I handled the electrical rough-in myself, routing wiring through the framed walls and ceiling while working around existing ductwork and other obstacles. I followed applicable National Electrical Code (NEC) requirements for securing and supporting the wiring, including using staples to keep the cables properly positioned.
Because this was a bathroom, GFCI protection was also an important consideration. I planned for GFCI protection at the vanity receptacle near the sink. The receptacles and switches would be installed later, once the walls were finished.
With the wiring and electrical boxes in place, the rough-in was ready for the next stage of construction. Getting everything routed and positioned before closing up the walls made this much easier to accomplish.
Preparing and Leveling the Floor
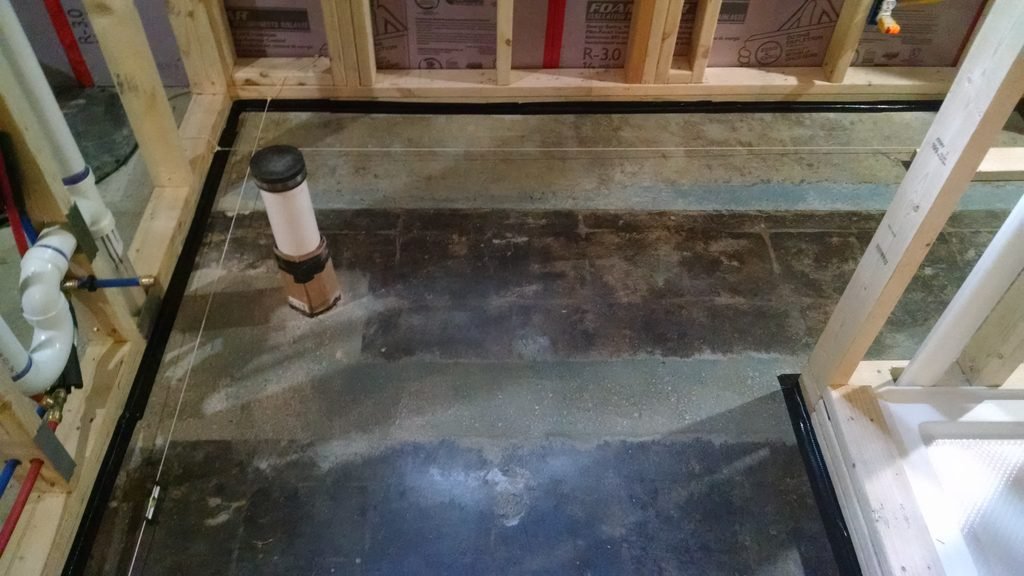
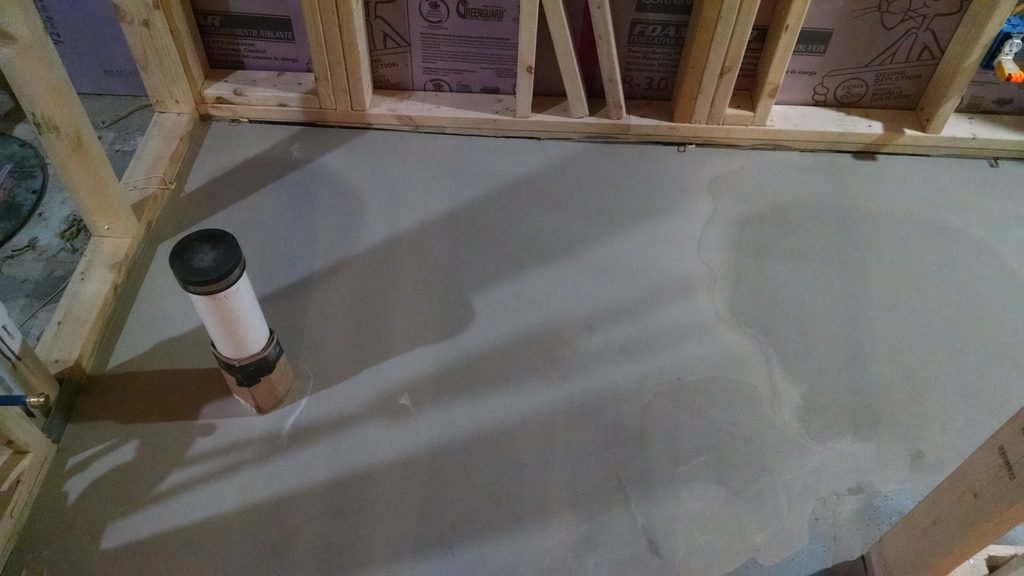
With the electrical rough-in complete, I returned to preparing the floor. Before applying the self-leveling compound, I stretched string lines across the floor in both directions to check the existing slope and identify the high and low areas. This helped me determine how the floor varied from one side of the room to the other and what needed to be corrected.
Once I had a better understanding of the floor elevations, I applied self-leveling compound to create a level surface. This step was important for preparing the floor for the next stages of construction and making sure the finished flooring would have a proper foundation.
Framing the Shower Niche
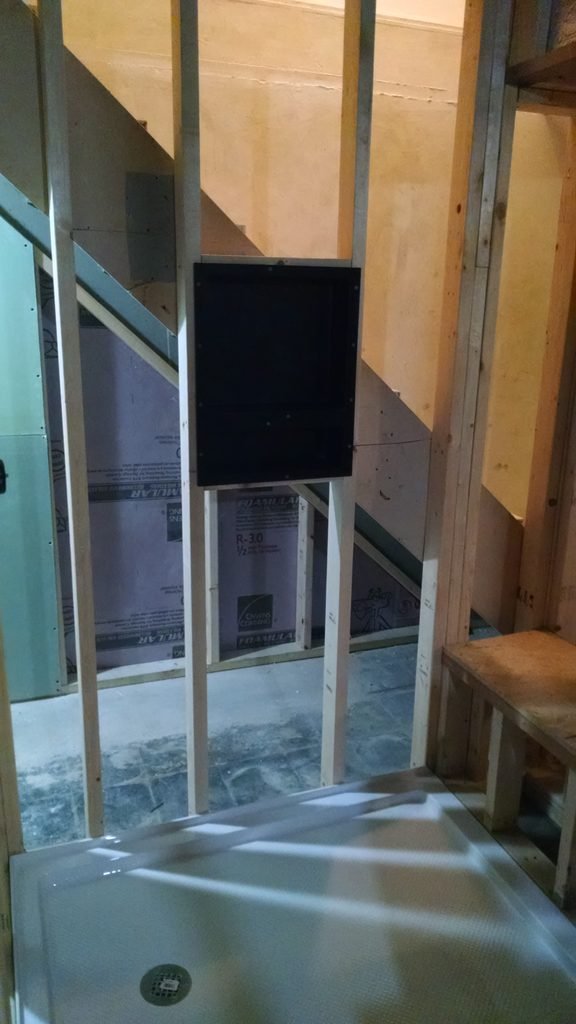
The final part of the framing work was preparing the opening for the shower niche. I added the necessary supports between the studs to create a secure opening for the recessed niche. Planning this during the framing stage made it easier to incorporate the niche into the shower wall before installing the wall board and tile.
With the niche opening complete, the major framing work was finished, and I could move on to preparing the walls for the next stage of the renovation.
Installing the Drywall
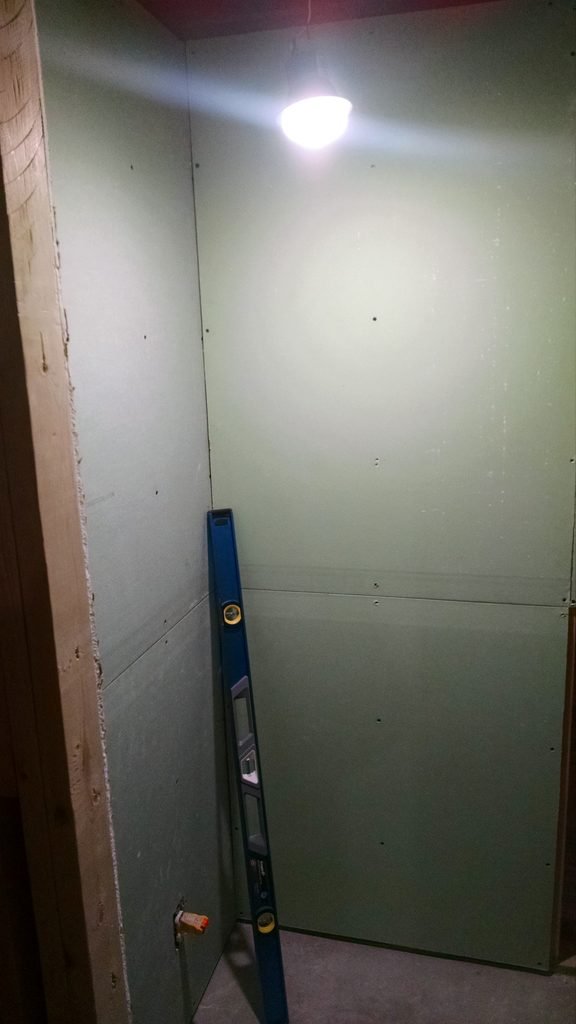
With the framing complete, it was time to start covering the walls with drywall. I handled the drywall installation myself, working around the framing, plumbing, and electrical rough-ins that had been completed earlier.
Once the drywall sheets were hung, I hired someone to handle the taping and mudding. Getting smooth, seamless joints takes a certain amount of skill and practice, and it’s one of those trades I have a lot of respect for. I’ll gladly tackle plenty of projects myself, but I also know when it’s worth bringing in someone who does that kind of work every day.
This was the stage where the room started to look less like a construction project and more like an actual bathroom.
Painting, Flooring, and Final Installation
With the drywall finished, it was time to move on to the finishing stages of the renovation. I started bringing the room together with paint, flooring, and the installation of the bathroom fixtures and trim. This is where all the work behind the walls and beneath the floor finally started to pay off.
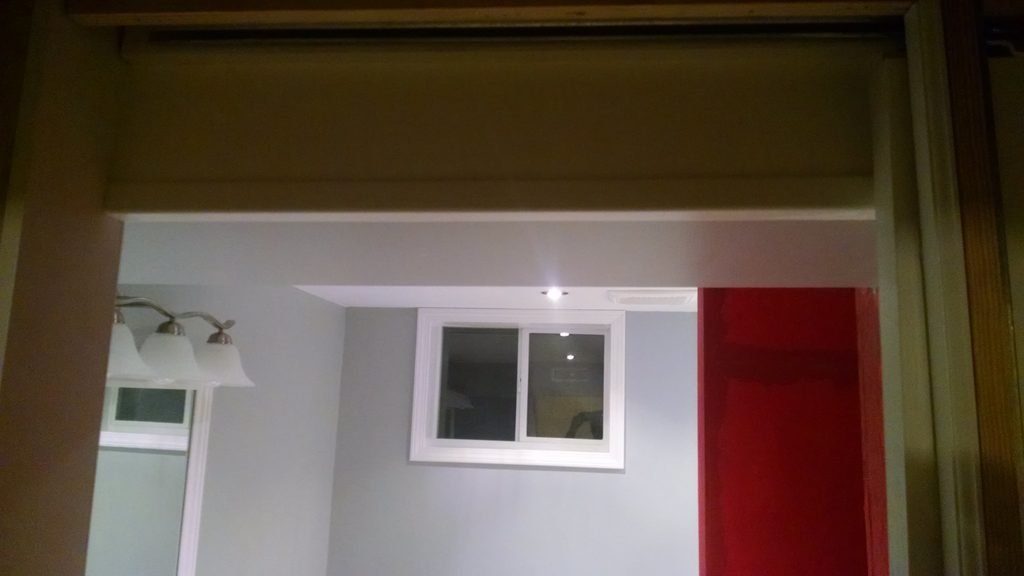
Once the room was ready, I painted the walls and installed the new flooring. With those surfaces finished, I could begin bringing in the bathroom fixtures.
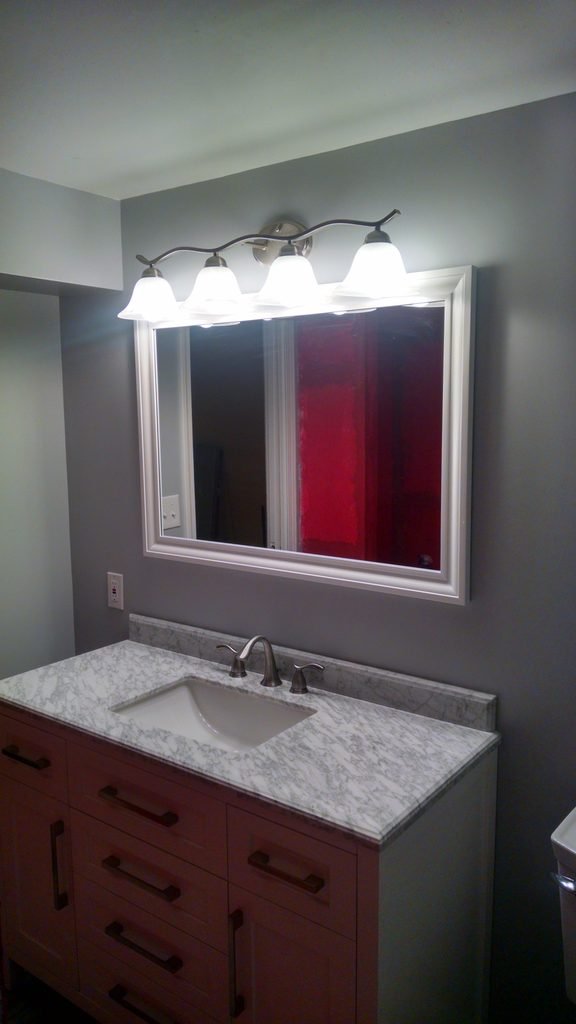
With the vanity installed and the plumbing connected, I finished this area by installing the mirror and light fixture above it. These finishing touches helped bring the vanity area together and gave the bathroom a much more complete look. It was nice to finally see the space looking less like a construction project and more like the bathroom I had envisioned.
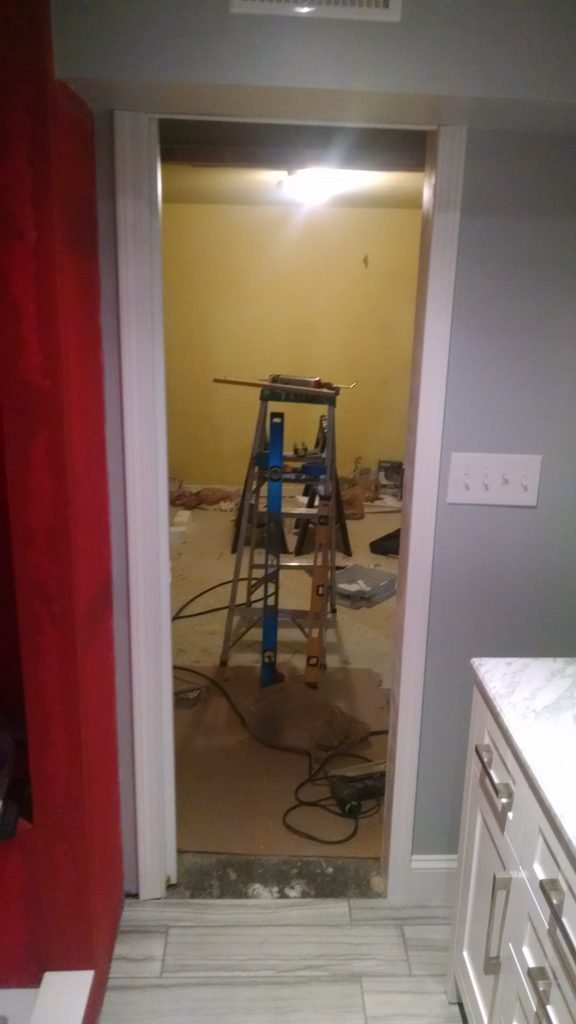
With the main fixtures in place, I moved on to installing the finishing trim around the bathroom. This included the door casing, window trim, baseboards, and trim around the HVAC ductwork. These details helped clean up the transitions between the walls, openings, and existing features, giving the room a more finished and polished appearance.
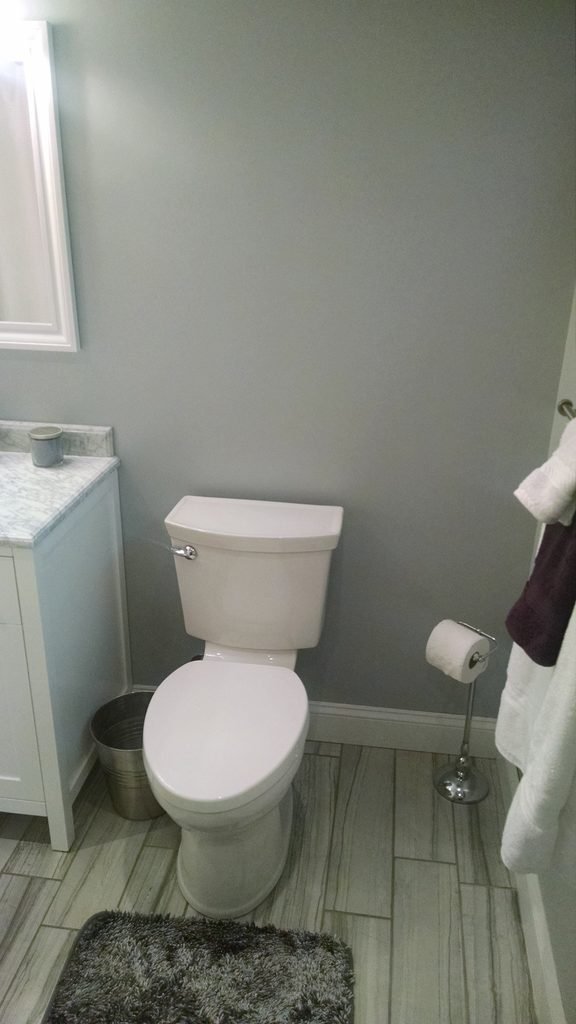
I installed the toilet, secured it in place, and connected the water supply line.
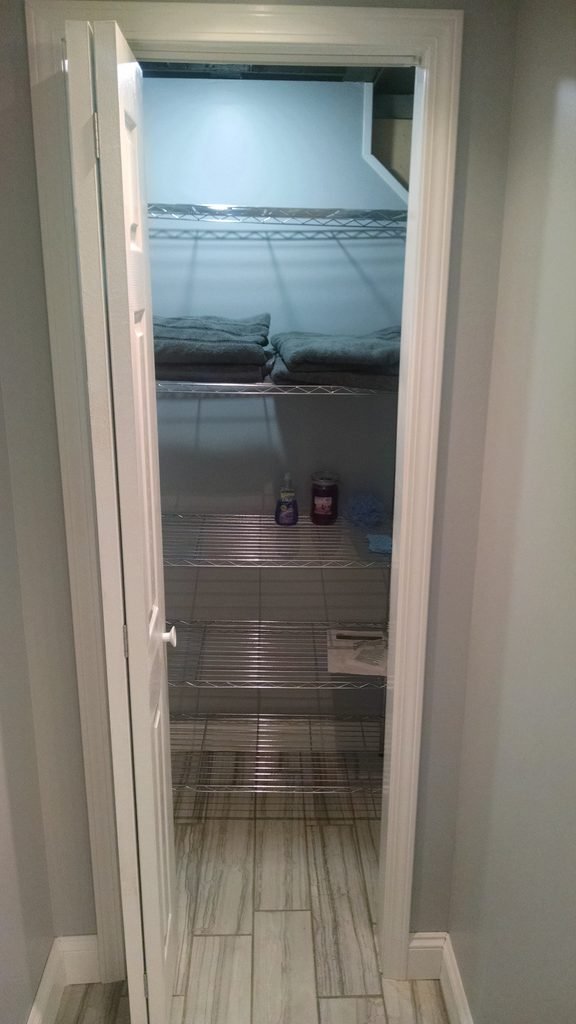
I also installed the closet door, adding the final touch to the storage area. With the door in place, the closet became a more finished and functional part of the bathroom while keeping its contents tucked neatly out of sight.
Installing the Shower Tile
With the shower framing and plumbing complete, I was ready to start tiling. I installed cement board on the shower walls, taped and treated the seams, and applied RedGard waterproofing to prepare the surface for tile.
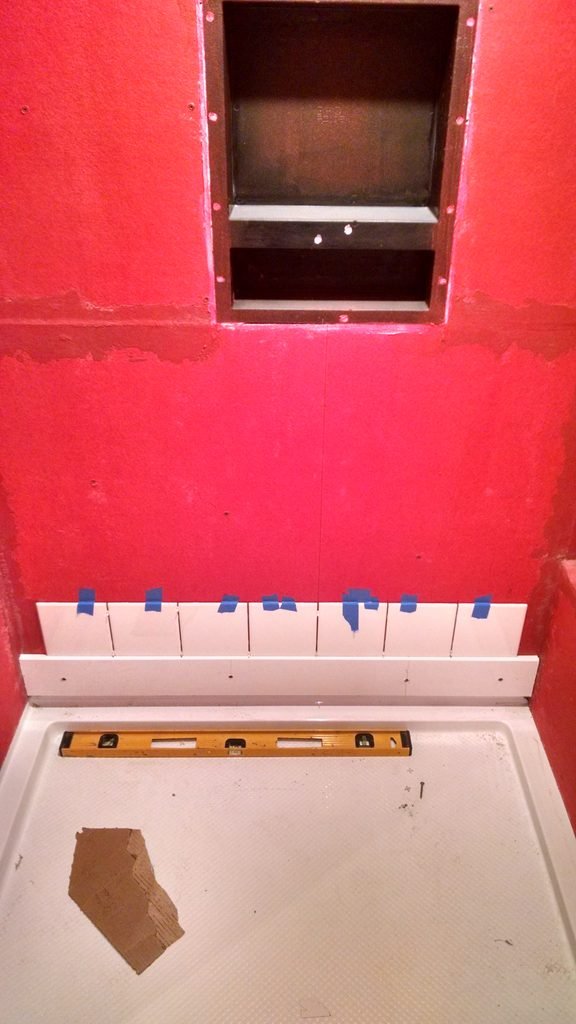
To get the first row straight and level, I installed a temporary ledger board along the wall. This gave me a solid starting point and helped keep the tile courses aligned as I worked upward.
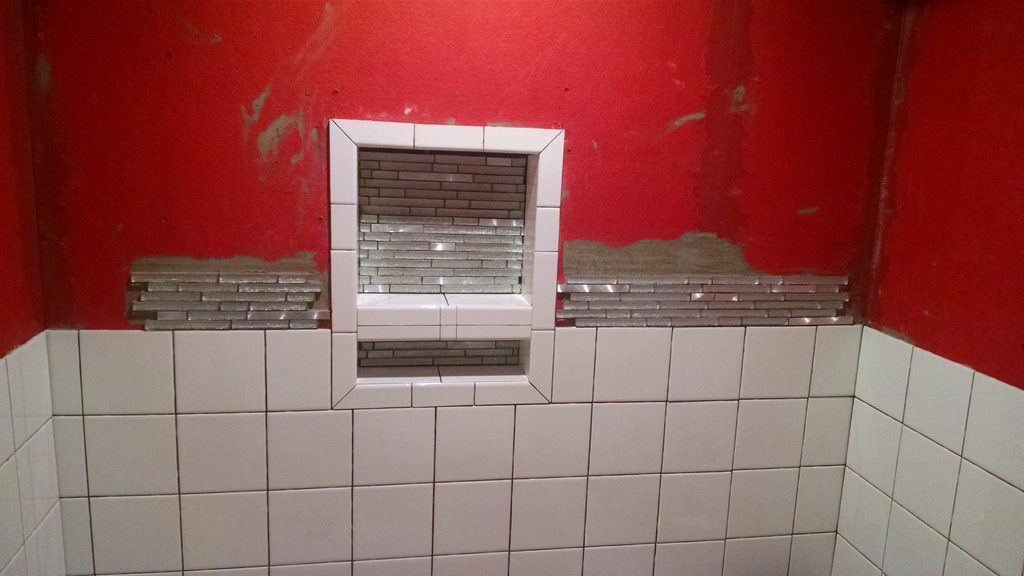
I started with the white square field tiles, then added a gray glass mosaic accent band for contrast.
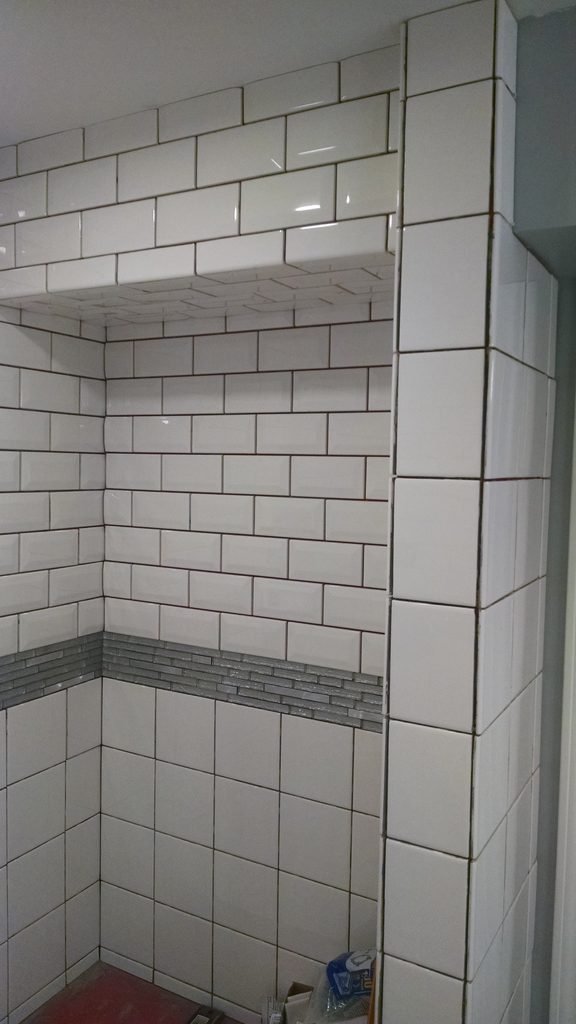
Above the accent band, I switched to white subway tile and continued it up to the ceiling, including the area around the HVAC ductwork. Once all the tile was installed, I grouted the joints to finish the surface and bring the different sections together. The combination of tile sizes and textures gave the shower a little more character while keeping the overall color scheme consistent.
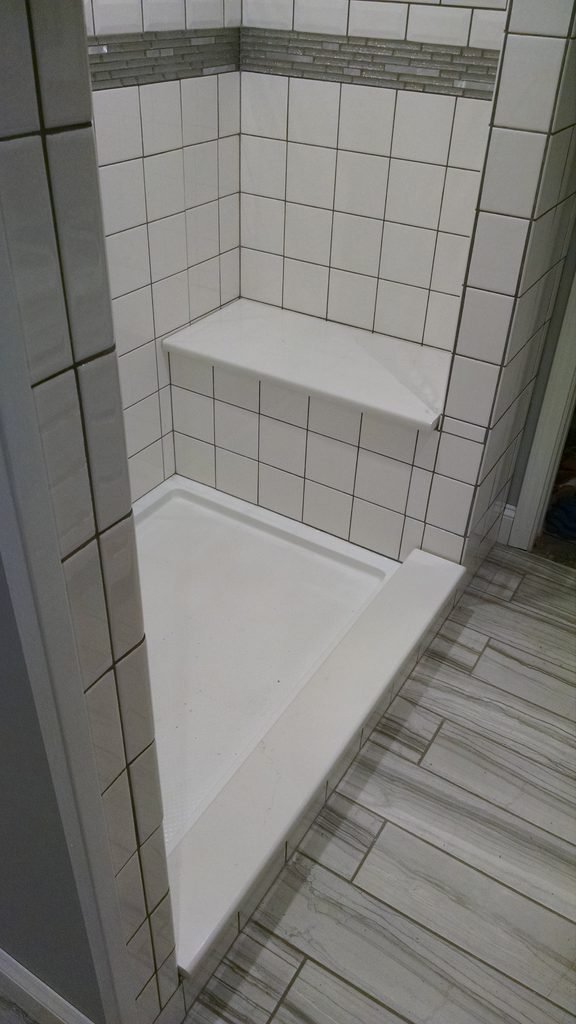
Once the bench framing was complete, I took measurements and visited a local stone quarry to have a custom marble seat made to fit the space. The marble provided a solid, finished surface that complemented the tile and made the most of the space I’d framed out.
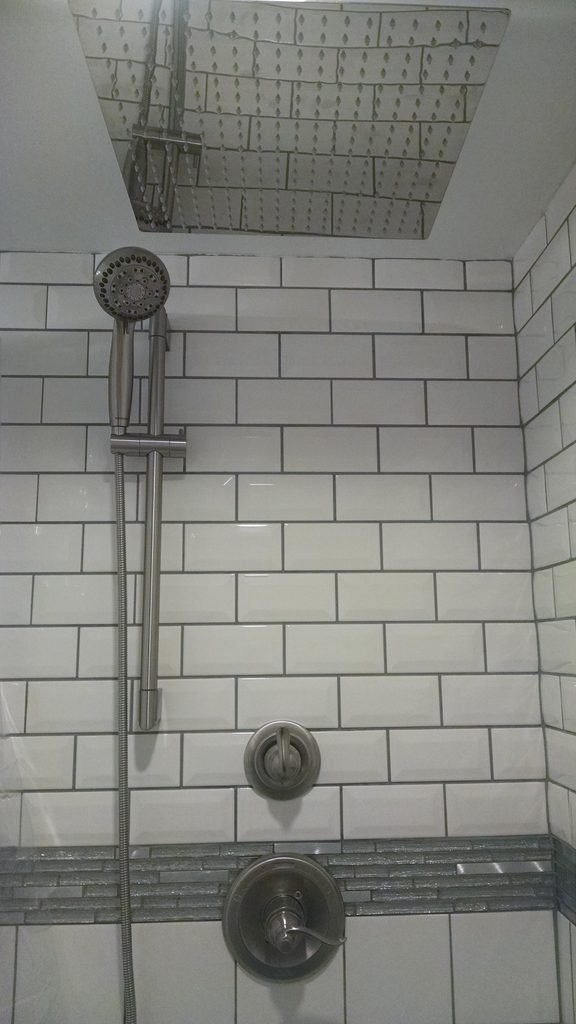
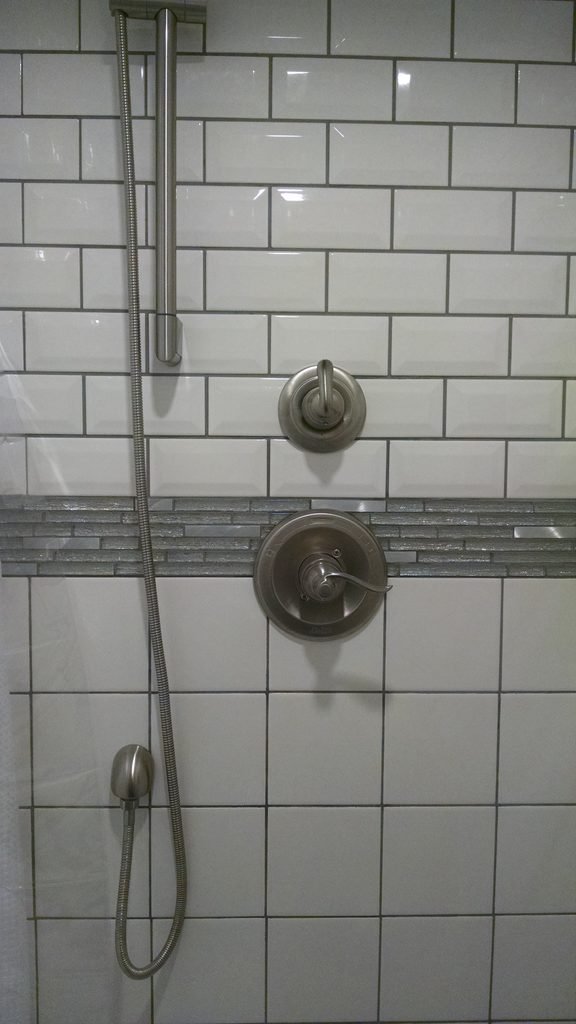
With the tile work complete, I moved on to installing the shower fixtures. I installed the rainfall showerhead in the ceiling, along with the shower valve trim, diverter valve trim, and handheld shower wand. These final components brought the plumbing and tile work together and completed the shower installation.
What I Would Do Differently Today
Looking back on the renovation, there are a few things I learned along the way that I’d approach differently if I were doing this project today.
Removing the Old Tile Adhesive
Removing the tiles was only half the battle. Once they were up, I still had to scrape all the adhesive off the concrete floor by hand. Between the stubborn glue and the amount of scraping involved, I went through multiple inexpensive irons and putty knives trying to get the job done.
Looking back, I wish I had spent more time researching the right tools for the job before starting. A better approach to removing the adhesive could have saved me considerable time, frustration, and the cost of repeatedly replacing tools. Sometimes, spending a little more time preparing for a job can save you a lot of work later.
Cutting the Concrete
Looking back, I would have rented a concrete saw with a wet-cutting option instead of purchasing one. Cutting concrete creates an incredible amount of dust, and even wetting the concrete beforehand didn’t do enough to keep it under control. Having the proper equipment would have made the job much more manageable and significantly reduced the amount of dust I had to deal with.
Estimating Materials Before You Buy
Here’s another lesson I learned the hard way: take the time to calculate how much material you’ll actually need before making a purchase. When it came to replacing the concrete, I bought 80 bags of concrete mix but only ended up using 22. That left me with almost 60 bags to haul back upstairs and return to the hardware store.
Carrying all those bags down to the basement was hard enough the first time. Doing it all over again to return them was a workout I could have avoided! A little extra time spent estimating materials before heading to the store would have saved me a lot of unnecessary work.
Final Thoughts
Looking back, this renovation was a lot of work, but seeing the finished bathroom made every step worthwhile. From the demolition and plumbing to the framing, tile, and final details, each stage brought the space a little closer to what I had envisioned. I learned a lot along the way, including a few things I’d do differently next time, but that’s part of taking on a project yourself. Hopefully, sharing the process, the challenges, and the lessons learned gives you some ideas and confidence for your own renovation. Sometimes the best way to learn how to get it done is to roll up your sleeves and do it.